RSS

How To Select the Right Paint and Color For Your Home

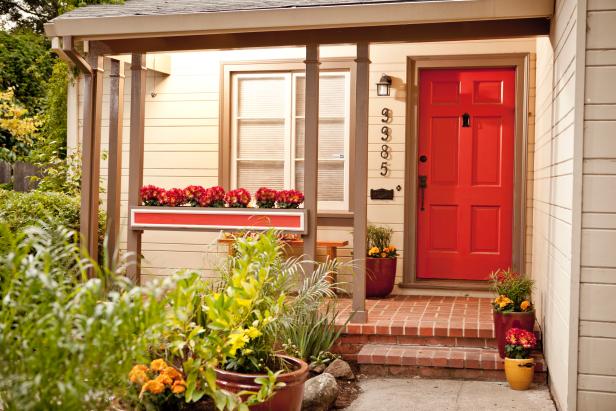
Painting is a quick and cheap way to give an old room a breath of fresh air or to make your house more sellable if you are putting it on the market. Find out all you have ever wanted to know about selecting paint. 

Which paint should you choose?

Paint comes in a variety of sheens as well as in either oil or latex. Latex paint is the most commonly and preferred paint type to use because of its ease of clean up and long lasting durability. It also tends to be more fade resistant and breathes better than oil, resulting in less blistering of the paint. I recommend using a latex paint for most of your walls and household uses. However, oil based paint is great for priming real wood moldings and trim as it tends to seal stains and knots from the wood better than a latex paint wood. It does take longer to dry than a latex paint though, so plan for more drying time. I personally use an oil based shellac primer on my trim and then opt for a latex paint as the top coat. There are a variety of brands on the market, but my top preference is Behr paint.

Which sheen should I select?

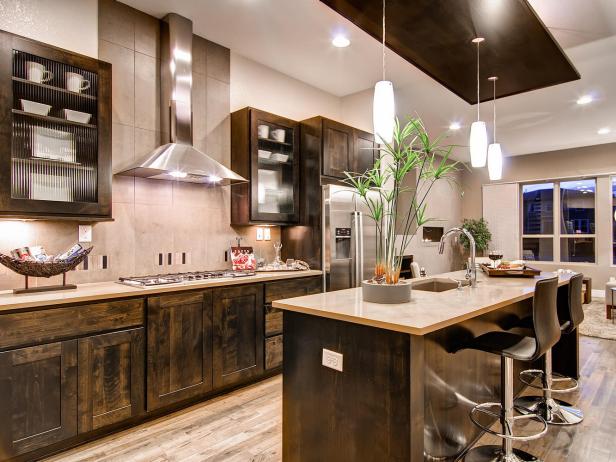
The glossier the paint, the easier it is to clean up. If you have small children and the room you are painting has high traffic, like in a playroom, or tends to get grease on the wall such as in a kitchen, opt for high gloss sheen as you can easily wipe the wall down with a damp sponge. This will however make blemishes and imperfections in your wall more apparent and in rooms such as living rooms, could give off an unpleasant shine. High gloss is also great for trim and will give the trim a nice finished look, complementing the flatter sheen of your walls.

Semi-gloss would also be a good choice for kitchens and baths as well as trim providing you with ease of wash-ability and less shine than the gloss. It is also slightly cheaper than the gloss finish and is a very common alternative. Satin sheens have a satiny smooth finish to them and could also be used in kitchens, baths and hallways. This may be a good choice if you really want some gloss and paint that can clean easily without the shine of a gloss.

If you have walls with lots of imperfections, select a flat or matte paint. You can usually get away with one coat of paint with a flat. The downside to this paint is that it does not stand up well to a good cleaning and does tend to show dirt more so choose this for rooms that will not get lots of fingerprints and dirt on them. Probably the most popular sheen is eggshell, which hides imperfections like a flat does but is easier to wash, so more durable and smoother to the touch. I recommend this for most rooms as it seems to have the best of both the flat and glossy worlds.


Which color should I choose?

If you are in the process of selling your house, I recommend selecting a white or off-white color as the choice for walls. This will allow the buyer to easily cover the wall with their choice of color and will give your rooms a brighter and clean appearance. However, you should take full advantage of the hundreds of paint selections and brochures at your local paint store as well as talk to a salesperson about the various color schemes for the look you want. You can change the feel of any room in your house with a little planning and some color, varying the shades for a certain look or feel.

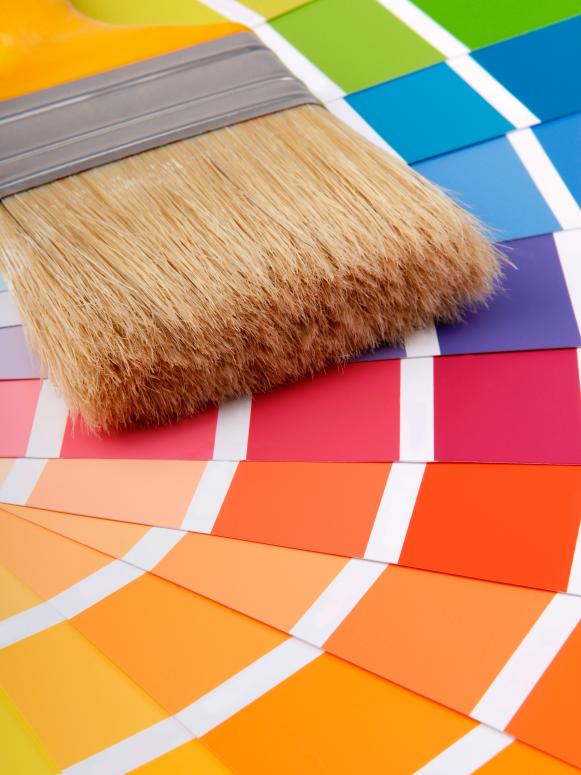
A good rule of thumb is to remember the color wheel. We all learned about the primary colors in school - red, yellow and blue. These are on the color wheel at 12:00, 4:00 and 8:00 respectively. Combining any of these will give you a secondary color (i.e. purple, orange). Colors near each other on the color wheel such as blue and purple are analogous to each other and will allow one color to stand out more. Colors opposite each other on the color wheel such as green and red are complementary to one another and will nicely play off each other. Staying within the same shade of color (i.e. greens) will give you a subtle and soothing look. Painting with cool colors such as blues, greens and purples makes small rooms appear larger and more airy while colors such as reds, yellows and oranges will give a room a more vibrant appearance. You can vary the warmth even with a red or yellow by choosing muted shades of those colors such as pink, peach or a buttery yellow. Warm colors have cool ones as their complementary colors while cool colors have warm complements. Shades are either pure or vibrant, muted (which are less intense than their vibrant counterparts) or shaded (the darker colors in the same color scheme). 

I want a subtle and soothing look:

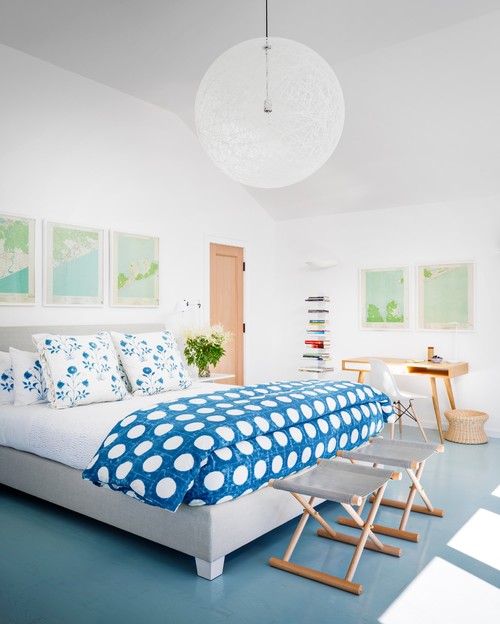
You can choose to stay within the same shade and use a monochromatic approach such as select a variety of shades of blue for subtle color that tends to be soothing. This tends to look good in a bathroom or a bedroom if you want the feeling of calmness. Just choose your favorite color and overlap the shades. For example, select a darker color for the wall and then another in the same color scheme but different shade and slightly lighter for the trim. Your curtains, towels or bedding as well as accessories such as candles can be varying shades within the same scheme. You can also layer the colors by selecting a lighter green as the basecoat and then do a faux paint with a darker green overlay.

Light color choices such as blues, lavenders, pinks and soft yellows are great choices for a romantic feeling of tranquility and restfulness in a room. If you are looking for a calm ambience in your bedroom, choose lighter shades of either cool or warm colors. Use different textures in your bedding and accessories to make the room even more appealing. Don’t hold to the old rule of one shade and one texture. You will be pleasantly surprised at the effects just changing textures and colors can have on a room.

 Colors such as sage can turn a kitchen quickly into one of comfort and shades of buttery yellows in a kitchen will lend to that feeling baked goodies brings. Shades of powdery blue also tend to yield feelings of tranquility.

I want an elegant look:

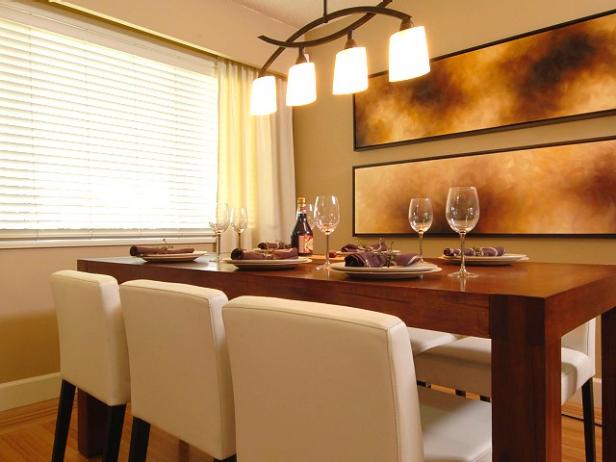
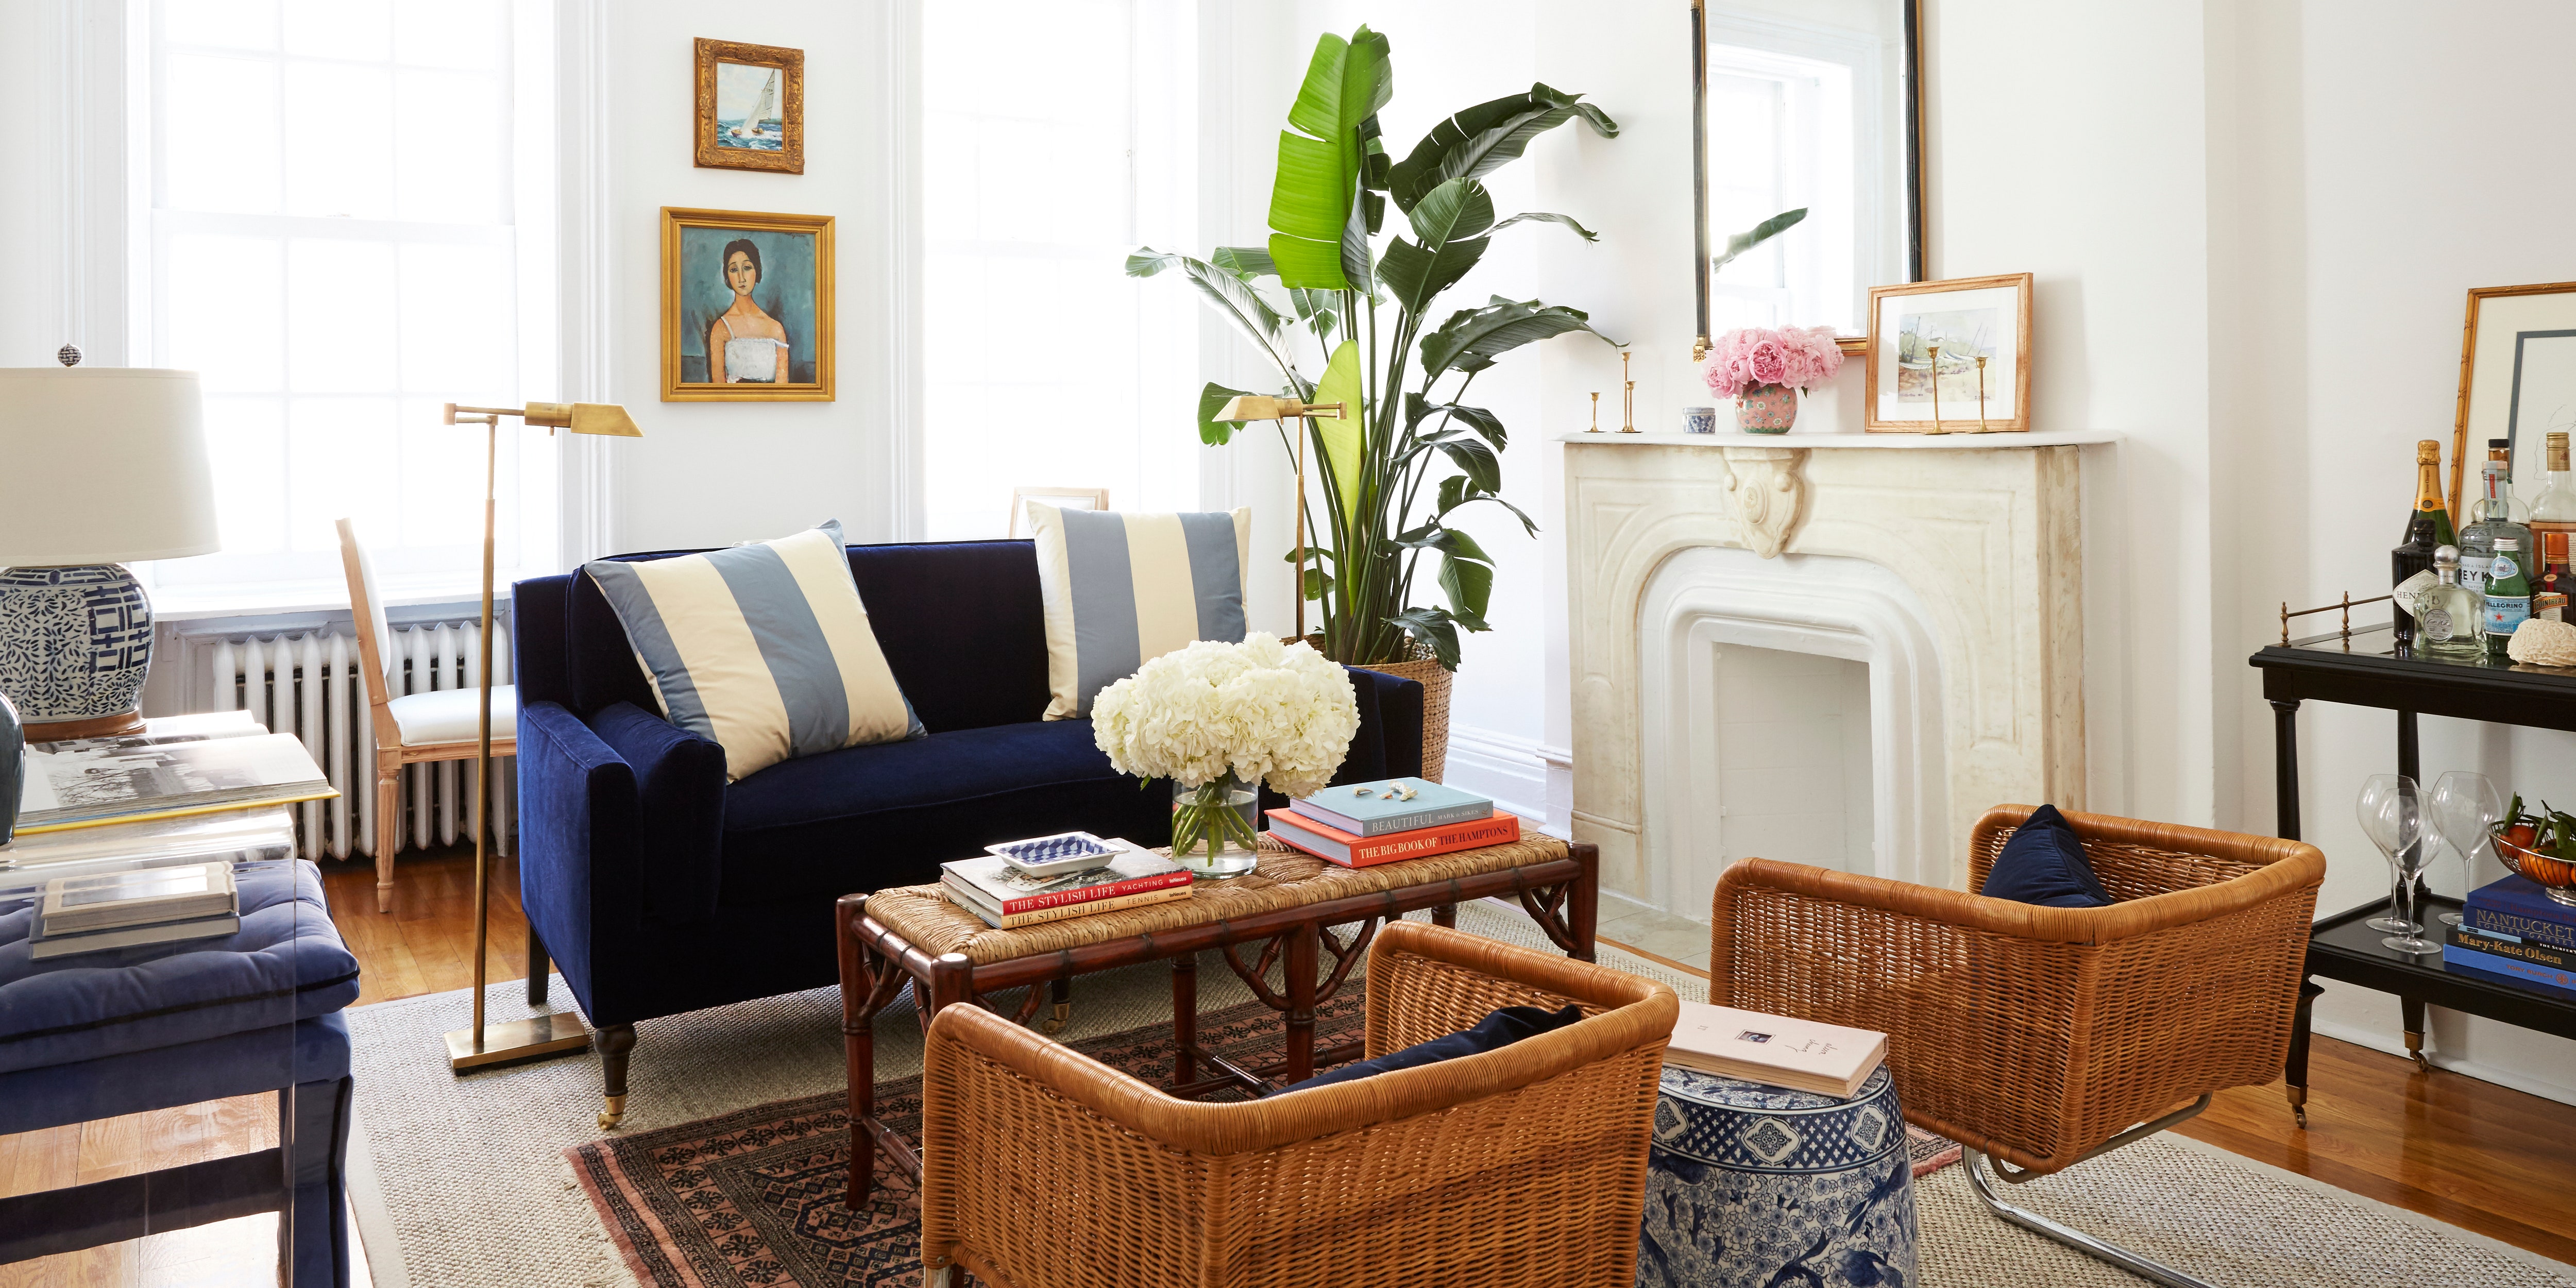
Neutral colors offer elegance and flexibility within a room. Neutral colors are no longer simply white or beige. You can turn a simple living room into one of elegance by selecting varying shades of neutral colors such as almond walls with red toned browns on the trim. You can also add splashes of color throughout the room with a color throw, pillow or vase carefully placed to offset the subtle neutral tones in the room. Again, don’t be afraid to add texture to your accessories. Neutral colors allow you more flexibility in quickly changing the feel to a room. You can easily change the feel of a neutral room by adding different colored accessories or painting the trim a new color. You can choose either lighter or deeper neutral colors and vary the look of the room. Remember, the lighter color you go, the more spacious the room will appear. Varying shades of rust, mahogany or garnet will offer instant elegance and a feeling of earthiness and richness.

 I want a vibrant look:

If you want a room with pizzazz, choose vibrant colors and their respective shades such as oranges and gold, reds and dark purples. You can complement these colors by selecting a two next to each other such as gold and orange and one from the opposite side of the color wheel such as purple. You can also select black and red for a real stand out contrast and look that is reminiscent of an Oriental look. Choose two colors next to each other on the color wheel for a visual contrast as one will stand out from the other.


You can lower a high ceiling visually by painting it a darker shade than the walls. By the same token, you can expand a room by selecting a lighter color for your ceiling than the walls. Don’t be afraid to add a tint of color to your ceiling paint for a tied in and subtle look. One way to go if you are afraid of too much color in your ceiling is to paint the ceiling, door trim and floor moldings the same shade such as a creamy ivory. This will add a touch of elegance and a nice transition throughout your room.

Creating Focal Points:

Think focal point when you are painting a room. You can quickly change the look of any room by adding contrasting colors to the walls and trim or by adding a darker color to one particular wall. You can make a large room look smaller by painting one wall a darker shade. You can also visually expand a room by painting the walls a darker color and the trim a lighter shade within the same color scheme, especially if you have a room with detailed trim on the walls. This easy change will make the room pop out more visually and add definite appeal. If you have a room with molding halfway between the ceiling and floor, use two different shades of the same color for a wonderful visual contrast. Highlight any interesting aspect in your rooms with a darker, complementary shade to the one you have chosen for your walls. Visible stairways, especially those in the middle of the room look incredible when painted a darker shade than the walls and gives you a wonderful focal point.

You do not have to spend a lot of money on an interior designer to redo the look of your house. With a little paint and a lot of imagination, you can easily change the look and feel of a room. Look for highlights of your rooms and think of ways to make them stand out. Think of how you want to feel when you are inside that room. Do you want to feel romantic and calm? Choose a light warm or cool shade. Or do you want to feel homey and comforted? Select buttery yellows such as for your kitchen. Do you want a feel of calmness and balance? Select shades of green that are light or moss or sage colored. Do you want to feel energized and express your vibrant personality? Choose vibrant shades. Do you want an air of elegance and serenity to a room? Select neutral shades or cool light greens. The point is, you can quickly feel the way you want with a can of paint or two, a paint brush and a little imagination. 


Source: DIY Network

Read

The Homemade Pegboard Entryway Organizer That’s Surprisingly Simple to Create (You Can Do It!)

Mornings can be divvied up into things that are hard and things that are easy; sleeping in: easy, deciding what to wear: hard, forgetting your keys as you dash out the door: all-too easy, building an entryway organizer to keep your keys, cards and coats all in one convenient spot: easy peasy! OK, we snuck that last one in there, but hear us out. This beautiful pegboard entryway organizer can be customized to fit any need and creates a space for all of your daily necessities. Best of all, this statement-making organizer is way easier to make than it looks (accepting praise from friends and family on your DIY: super easy).


Materials to Make a DIY Entryway Pegboard

To make this project you’ll need a pegboard, plywood, pencil, drill, dowels, saw, saw guard rail, shelves and a mirror.


Step One: Mark Holes for Pegs

Using the pegboard as a measurement guide, mark through the holes on your plywood board that are 5″ apart using your pencil.


Step Two: Drill Holes Into Plywood Board

Place the plywood on top of scrap wood and drill holes according to the marks. Hold your drill at a 90-degree angle to ensure the holes are completely straight.


Step Three: Cut Dowels

Cut each dowel to 3.75″ in length.

Step Four: Hang Board

Hang your board on your entryway wall.


Step Five: Arrange Dowels on Board

Place your dowels where desired for hanging items and create shelving by placing two dowels along the same row and setting shelves on top. You can also rest a round mirror on top of two dowels to create a small vanity.


Don’t limit yourself to entryway essentials. This pegboard comes in handy in mudrooms for pet accessories, in bedrooms and playrooms for toys and books and bedrooms for robes and catch-all bowls. The opportunities are endless!


Source: HGTV

Read

Clever DIY Gym Shelf


If your new workout routine has you breaking a sweat from home instead of inside a crowded gym, chances are you have a bunch of clutter gathering around your fitness equipment (hello, new stationary bike and dumbbells!). Solve that problem with an easy to build French cleat wall organizer and you’ll be even more motivated to get your sweat on. Read on for seven simple steps to create this snazzy shelf for yourself.


Materials:


● 1 sheet of 3/4” plywood
● 1” solid wood material for frame and individual organizers
● Brad nails
● Wood glue
● Stain and/or finish
● Hardware to hang organizer on the wall (ensure it’s adequate for the weight of the organizer)


Tool Requirements:


● Table saw
● 18-gauge brad nailer
● Tape measure
● Square
● Safety protection (i.e. safety glasses, dust mask, hearing protection)
● Screw driver


Step One: Cut the Plywood


Cut the plywood to your desired size. Keep in mind that the final product will be quite heavy upon completion. This example was four feet wide and three feet high.


Step Two: Create the French Cleats ​


To create the French cleats, cut 2” pieces from the remaining plywood using the table saw. For this example, you’ll need nine pieces. Then adjust the table saw to 45 degrees and cut a 45-degree bevel on each 2” cleat. Finally, mark out with a pencil and cross cut each cleat to the exact length of the plywood instead of using a tape measure. During this step, make a few extra cleats to use as backing for the organizer units in step five.


Step Three: Attach the French Cleats


Put some glue on the bottom of the first cleat and line it up with the bottom of the plywood using a square. Use brad nails to secure the cleat in place. Use a scrap piece of the 2” plywood to space out the next cleat and repeat the process of gluing and nailing for the remaining French cleats.


Step Four: Create the Frame ​


For the frame, you’ll be cutting four pieces of 2” wide trim from the 1” solid wood. Measure the top and bottom of the plywood first and then the sides before cutting the lengths. The sides will be longer than the plywood because the width of the top and bottom frame will be added. Once all four sides are cut, glue and brad nail them to the plywood.


Step Five: Build Your Organizer Units​


With the remaining 1” solid wood, create whichever type of organizer units will work best for you. To do this, measure, cut, glue and nail together the boxes or shelves. Once the shelves and boxes are created, using the spare cleats you made in step two, cut them to their appropriate lengths for each organizer unit and attach them to the back of each unit using glue and brad nails. Check that the cleats will be “level” by making sure they are the same distance away from the top of the unit, along the entire length of the cleat.


Step Six: Apply the Final Touches and Secure to Wall


Sand everything down for a nice smooth finish. Apply a stain colour of your choice to the entire organizer as well as the organizer units. Follow the directions of the chosen stain for the best results. Attach the hardware that you’ve chosen for the organizer to the back of the organizer and to the wall. Remember to ensure it is adequate to handle the weight. The hardware should be screwed into wooden studs when possible. For this organizer, a low profile aluminum French cleat was used, which can be found at specialty woodworking stores. And finally… hang your new shelf!


Step Seven: Decorate!


Position each unit where you’d like and fill it up with your personal items. The best thing about a French cleat organizer design is that it’s modular: you can add and subtract different units/shelves whenever your needs for the organizer change.


Source: HGTV

Read

Whether your tastes run towards a more traditionalharvest-inspired arrangement or a spooky, Hitchcockian display, October is a great time to change up your fireplace decorations. To help you choose your mood, I’ve created three easy looks using the season’s bounty and simple accessories found around the house: pumpkins, gourds, Spanish moss, Chinese lanterns, paper cut-outs and tabletop accessories. Here, inspiration for your October mantel makeover

Gothic Chic

The great thing about going Gothic for the season is getting both the spook and the romance. A traditional Gothic mantelpiece is easily achieved by arranging any number and manner of objects with an antique look, such as silver and pewter candlesticks, pitchers and vessels, along with shapely seasonal gourds and unkempt foliage. Chinese lantern flowers and small pumpkins still on the vine add a bright spot of colour.

Spanish moss ties all the elements together while black feathers and a store bought bat garland (West Elm) make the mantelpiece Halloween ready.

A Painterly Still Life 

A traditional mantelpiece that’s more sophisticated than creepy works well throughout the month of October. And it couldn’t be simpler: layer a selection of pumpkins and gourds in a simple colour palette, with Spanish moss and simple Mason jar lanterns. Here, creamy white pumpkins and soft blue green gourds make a painterly statement that is reminiscent of an 18th-century Dutch still life.

Tip: It’s important when using similar elements, such as these gourds, to create some sense of variation. Mix in wood pedestals, cake stands, gold or bronze vases, and stack gourds on top of each other to create a difference in height.

Creating Illusions

Take your inspiration from classic thriller films like Alfred Hitchcock’s The Birds or The Crow and decorate your mantelpiece with a throng of paper cut-out birds. Place them strategically around your fireplace to give the impression they are swooping in for the kill, or pecking at treats you have left out.

Dishes filled with licorice candy and other sweet treats is an easy and inexpensive way to fill your mantelpiece with Halloween goodness. Keep your accessories dark or black, such as skull candles, twilight hued gourds, and black feathers to complete that eerie look. If you run out, you can always spray paint some impromptu thrift store finds or forgotten trinkets hiding in the cupboards (everybody’s got some!).


Source: HGTV

Read

Baseboards, Doors and Trim: Should You Paint Them White?

I’m not sure when it happened, but at some point during the last century it seems a decorating law was passed that required the vast majority of all baseboards, mouldings, trim and doors to be painted white. It didn’t matter what white – it had to be white. Painting doors and trim white shines a spotlight on these items, and unless they possess a degree of architectural interest, they probably don’t deserve to be centre stage. The fact is, whether you believe white is the absence or confluence of all colours, it can often do a disservice to your wall colour: many grey/blue walls have been transformed into a juvenile baby blue, and reds made harsh and unwelcoming, when trimmed with white. White can rob colours of their complexities, and it’s the wall colour that takes the fall because all the white is doing is looking clean, sparkling and innocent.


Before we fell under the spell of white trim, homes across the globe had trim that was painted darker than the walls. In fact, it wasn’t unusual for doors, trim and especially baseboards to be painted black. The thinking was that people would inadvertently kick, damage, or get fingerprints all over them and they would likely be covered in dirt and dust. Sound reasoning, actually. Well, perhaps you’re not ready to paint your trim, doors et al black, but here are some different approaches to consider when choosing a colour for trim.


Use a shade, Tint or Tone of the Wall Colour


Using a lighter (tint), darker (shade) or greyed-out (tone) version of your wall colour is an excellent way to complement your wall. If you choose a paint from a typical sample strip, you can usually go up or down one colour to find your tint or shade, you will probably find your tone, the colour with grey added, on a different strip. The issue of the grey/blue wall becoming baby blue with white trim is solved when the trim is a pale grey/blue – at first glance this technique gives the look of white trim, but because it now shares pigment with the wall, the two work together to reinforce the colour scheme without competing. Going darker with a shade or tone is also a safe bet that deliver high impact results.


Paint Trim and Doors the Same Colour as the Walls

This is an advisable option when trim and doors have minimal features worth highlighting, and a particularly good idea for small spaces, where you don’t want to interrupt the eye as it travels across the room. Breaks in colour create subconscious pauses as we view a space, and the room becomes a series of blocks of colour rather than a more desirable continuous flow. A subtle break can be created by using a glossier finish on the trim. Painting walls and trim the same colour can create a very cozy, enveloping effect.


Choose a Different Colour Altogether


A yellow room gives you the feeling of an English cottage when paired with a classic deep blue trim, while a rich red dining room will assume an old world elegance with taupe trim and a green living room could look fabulous alongside French grey. Painting your trim a contrasting colour is a more daring approach: you will need to tie in both colours with the decor, and your colour choices will need to be well thought out. But, when done well, the effect can be whimsical, elegant or stately – depending on your design objective. You can pick colours that complement each other, or stick with one from the neutral family and have a little fun with the other. This technique can be used if you want neutral walls – your trim can be the source of colour. And, don’t rule out black – black trim can create a stunning and dramatic effect with very little effort.


Let’s lift the ban on pigment-infused doors and trim and pick colours that will imbue every element in your room with personality. You put a lot of blood, sweat and tears into choosing your wall colour, so optimize your hard work with trim that pulls its weight in your design scheme.


Source: HGTV

Read

15 Hot Bedroom Decorating Styles and Tips

When it comes to your bedroom’s décor, the best trend is always to do what makes you comfortable and what you love. From overall design styles to individual elements, you're sure to find inspiration for your next update. They are all very livable, with nothing too extreme or fussy, and there's a little something to match anyone's style.

Here are some styles to consider for your next bedroom redecorating.


Modern Farmhouse


This isn’t the country-cutesy look of the 1990s, nor is it the rough farmhouse where your Grandma grew up. This style is known as modern farmhouse and it works as well in the bedroom as it does in the kitchen.

It shows off traditional elements of classic country, including metal beds, distressed wood, and painted wood-clad walls. It also incorporates touches of contemporary style: a lack of clutter, a soft color scheme, and modern and industrial accessories, like this bedroom from Hendricks Churchill.


Rustic


Rustic is not easy to define because it's as much a feeling as a style. Essentially, it comes down to natural materials in an unprocessed state or materials that are returning to their natural state through age and use.

It has an overall casual style. Key elements include distressed wood, a palette of natural and neutral tones, touches of fur or stone, textured fabrics, and primitive accessories.

Rustic doesn’t mean uncomfortable or devoid of contemporary touches. Feel free to pile your bed with thick coverlets and soft sheets and add contemporary lighting. You can also add a few rustic pieces to an otherwise traditional room.


Mid-Century Modern


Midcentury modern was at its height from the 1950s through the 1970s. It's made a comeback in living and dining rooms, and it's perfect for the bedroom.

Long, low furniture with thin legs, clean lines, and a streamlined appearance are hallmarks of this style. It also includes “modern” elements such as molded plastic, chrome, and pops of bright color and geometric patterns.

The overall look is uncluttered, but large pieces of colorful artwork on the walls are a must. You can add accents in the typical orange, red, yellow, or blue of the period, like this cozy room featured on Decoist from Brad Ford ID. A rounded butterfly chair or nightstands perched on chrome legs are nice touches as well.


Scandinavian
 

Scandinavian decorating style covers a lot of ground. What it all has in common is a casual, simple, clean vibe, along with a heavy emphasis on white. Scandinavian bedroom décor boasts these characteristics.

If you shop at Ikea, you’re familiar with this look. It’s functional, it’s uncluttered, and it uses lots of texture to add warmth. It is also without excessive trim, adornment, or curved lines. Yet it’s not cold or sterile; rather, it’s welcoming, cozy, and even a little bit romantic. 


Industrial

 
Whether you live in a converted warehouse or you just want to pretend that you do, the industrial decorating style is for you. This is a look that celebrates raw energy, youthful excitement, and “I make my own rules” individuality. Continue this energy in an industrial-style bedroom.

One of the key elements of this style is exposed construction elements, such as water pipes, heating vents, concrete floors, and brick walls. While the typical industrial palette leans towards gray, black, and other dark hues, there’s plenty of room to add color through artwork or accessories.


Hollywood Regency


Hollywood Regency isn’t a look for the timid or reserved—this is all-out glamour. It’s a look born during Hollywood’s glamorous heyday of the 1930s. It is full of the glitz, opulence, and expensive sensibilities of the period. 

You’ll find lots of luxurious fabrics, such as velvet, silk, satin, or brocade along with fur, lace, and suede. Lacquered or mirrored furniture is an essential part of the look. Oversized upholstered headboards, beaded lampshades, chandeliers, and cushy, thick area rugs round out the luxurious feeling.


Vintage


Technically, vintage means anything made more than 20 to 100 years ago. However, in the decorating world, it generally refers to styles popular during the 1940s and 1950s. 

That still covers a lot of ground, but most people decorating a bedroom with vintage finds focus on the feminine and romantic look. Wrought iron beds, vintage bedding, mint green or white painted furniture, curved lines, and ornate trim are all common to this look.

Quite often, vintage pieces are added to other styles, such as shabby chic or eclectic bedrooms, as well.


Minimalism


Part design theme, part philosophy, the minimalist bedroom has been hot for years. It shows no sign of slowing down anytime soon.

Paring your bedroom down to the essentials doesn’t mean living in a bare box. Instead, it means getting rid of clutter and fuss while surrounding yourself with peace and simplicity. A limited color scheme, furniture with clean lines, and a platform bed without a headboard are typical of the minimalist bedroom.

 
Zen


While not technically a decorating style, Zen is an Asian-influenced look that is very simple, clean, and tranquil. It is a great setting for relaxing and getting a night of restful sleep.

Along with the obvious Asian designs in the furnishings and artwork, you’ll find an emphasis on airy, open space. It includes few (if any) collectibles or clutter and a soft nature-infused palette and overall vibe. Natural fabrics and materials, minimal window coverings, and houseplants are must-haves in this theme.


Wood Plank Walls


Take the rustic warmth of a log cabin and add it to a bedroom with contemporary furniture. The result is a bedroom style that is warm and peaceful, but not overly sentimental or fussy.

If that appeals to you, distressed wood paneling in a room with otherwise contemporary furniture is right on trend.

This is not the dark paneling of a 1970s basement. This is plank paneling—wide boards that look like they came straight from an old barn. It's perfect for a focal wall in a rustic or modern farmhouse room. And, if that’s too much primitive wood for you, try a plank headboard instead like this chic one from Better Homes and Garden.


Strong Color on the Walls


Strong color has long been a hot trend and it will be around for quite a while longer. For bedroom walls, deep navy or indigo blue, dark gray, and rich chocolate brown are popular choices. These are all soothing, subdued hues that create a peaceful, relaxing vibe that's so important in the bedroom. 

Bold walls make a strong statement, like in this room from Our Fifth House, so it's important that your choice is not harsh, overly intense, or bright. If you don’t want to go all out and paint the walls, use touches of dark color as accents throughout your bedroom.  


Warm Metals

For a few years, cool tones of silver, chrome, and pewter were the decorating stars. The pendulum has swung in the opposite direction and warm metals are having their time in the spotlight.

Gold and copper are especially hot, but you don’t want to overdose on the metallic trend. A little bit of shine goes a long way, especially in the bedroom.

Feel free to mix metals, but limit them to just a few accents throughout the room. Go with a bedside lamp or ceiling fixture, curtain rods or picture frames, furniture trim or collectibles. 


4-Poster Beds


The four-poster bed is a classic style, and you cannot go wrong with one of these beauties in your bedroom. The contemporary four-poster is clean, simple, and often without a canopy. It has a completely different feel from the ornate Tuscan or country styles that were popular in the past.

There’s something cozy about curling up in a four-poster bed. It’s as if you’re in a cocoon or your own little world. That's why it is one of your best options when it comes to setting a romantic bedroom vibe. 


Statement Light Fixtures


If your ceiling sports nothing fancier than a light bulb covered by a glass bowl fixture, it’s time to upgrade. The contemporary style calls for a statement light fixture. It's a strong touch that is enough to liven up an otherwise quiet bedroom.

The style is up to you—chandelier, oversize hanging shade, unique sculptural fixture, or something whimsical and fun. The only requirement is that the fixture is large enough and bold enough to attract the eye when someone enters the room. 


Wallpaper


Wallpaper is back and it's better than ever. Designs today are larger and brighter than the fussy, small patterns you might remember from a few decades ago.

Whether you cover one wall or all four, look for strong color, geometric designs, textured wallpaper, or oversize florals. You can also choose an easily removable wallpaper to liven up the walls of a rental or to change the pattern when you grow tired of it


Source: The Spruce

Read

7 Things That Won't Increase Your Home Value

Homeowners often assume that upgrades and renovations always increase their place's value and make it more sellable. But while many home improvements can add to a house's appeal, they may not, in fact, add value and, in some cases, could even act as a detriment when the property goes on the market. Here are seven of the most common home improvements that could turn out to be mistakes.


Extensive Professional Landscaping

You can build an entire amusement park in your backyard and it won't bring you big bucks upon resale. If you want to put in a waterfall that cascades down into a koi pond, do it because you enjoy the water feature, not because you're hoping to recoup the investment. Landscaping choices are a personal preference, and all the hand-crafted bridges and unique pergolas in the world won't dramatically boost your bottom line. And some buyers will inevitably see only the money required to keep that beautiful backyard well maintained.1


Upgrading the Utilities

Although you may have paid thousands to install new copper or PEX plumbing, replace your sewer lines or septic system, or upgrade the electrical wiring to Romex or conduit, it's unlikely to bring you more dollars. These types of utility improvements are considered home maintenance—and your neighbors probably made them years before you. Of course, getting everything state-of-the-art isn't a bad idea: In certain areas, top-of-the-line is considered the standard, and without it, you could take a hit when selling time comes. 

 
But don't convince yourself these upgrades will let you mark up the price tag.2


New HVAC

Many buyers in the marketplace appreciate a home that features a brand-new furnace or HVAC system, but they won't pay you much extra for having replaced it. However, if the HVAC system is particularly energy-efficient, you should use that as a selling point; it may make a potential buyer more excited about purchasing your home.3


New Roof

The same holds true regarding a new roof: Replacing a roof past its average life expectancy of 30 years is considered a maintenance issue and won't necessarily enable you to up your asking price. But giving buyers who are on the fence the peace of mind that they won't have to make that costly repair anytime soon could spur them to make an offer.2


Swimming Pool or Hot Tub

The TV commercials for pools and hot tubs depict children having a blast splashing around and adults sipping cocktails in the bubbling water. Sadly, though, the cost and expense of aquatic amenities almost never find their way back into your pocket.4 Many people won't buy a home with a swimming pool. They don't want to deal with the upkeep or safety issues. In fact, as part of negotiations, a buyer might insist that you tear out the pool or whirlpool. If you want to install a pool or hot tub, do it because you will enjoy it, not because it will pay off when it's time to sell.


Making Quickly Dated Decor Changes

You might like white appliances and white ceramic counters, for example, but young home buyers do not. They are no longer "in." And don't go down the road of rose gold bathroom fixtures and door hardware. Even 12-inch-by-12-inch ceramic flooring has lost its appeal to some. The point is, don't deliberately decorate in the latest style for resale reasons. Fashion just changes too fast.5


Solar Panels

Sure, the salespeople at the solar panel company tell you that installing solar panels will enhance your home's value, but that's often not true. Going solar may be an admirable thing for the environment, but it usually does nothing for your residence's selling price. Moreover, if you have financed the solar panels, you probably can't sell the home without paying off the balance at closing, something that often is not disclosed.6


The Bottom Line

Some homeowners are devastated to find out that the improvements they invested in—and perhaps borrowed money for—not only do not improve the value of their property but might actually detract from it. Fortunately, while most of these enhancements won't help you turn a bigger profit, they probably won't hurt, either—and they might make it easier to sell your home by giving the buyer peace of mind. Just don't confuse buyer peace of mind with an elevated price tag.


Source: The Balance 

Read

Top 10 Rules for Staging Homes from The Stagers

1. Grab them from the curb.

You've seen them. Buyers hunkered low in their cars in front of your house, doing drive-bys before deciding whether to request a showing or attend an open house. Make these potential buyers fall in love with your home from the street by adding potted plants and flowers, power-washing patios and walkways, weeding the garden and mowing the lawn. It's your first chance to make a good impression, so you've got to make it count.

2. Make it sparkle.

Pretend that your mother or mother-in-law is coming for a visit. Think hotel clean. Mop, dust, vacuum, wash windows, baseboards — even the cat. Remember that people will look in your cupboards, under your sinks and in your closets. Also, pay particular attention to odors. You might even consider consulting a neutral nose by having a friend come by for a smell test.

3. Pay attention to color and light.

You may love hot pink in the living room, but too-bright colors turn buyers off. Neutralize strong colors for the broadest appeal. A neutral home appears larger and has less chance of offending someone. Also, open up blinds and draperies to make sure there's sufficient natural light throughout the home. Remember, lighting is the most effective way to set a mood.

4. Depersonalize.

Not only can an area rug hide shabby flooring, but it can also bring in added color and depth to a space.

Few things deter buyers more than a cluttered home. They need to see your home, not your stuff. Excessive personal items like photos, collections, personal awards, electronics and collectibles will make it difficult for buyers to see past your personal style and may deter a sale. Taking yourself out of the picture makes it easier for buyers to imagine themselves, and their stuff, in your space.

5. Consider replacing furnishings.

Think about removing or replacing worn or outdated furnishings and get rid of extra pieces. The time has come to move beyond matching furniture, so break up your sets; dated can easily become eclectic with editing and rearranging. Consider consulting with a professional staging company for design direction and advice on rental furnishings to create an inviting home with broad appeal to a wide range of buyers.

6. Invest in new artwork.

Displaying new artwork is a great way to breathe new life into a room. Photography can be used to contemporize a room and add a splash of color as well.

7. Make repairs.

Make your home a high-maintenance zone. Repair squeaky doors, chipped or smudged paint as well as broken fixtures and fittings that you've neglected.

8. Apply a fresh coat of paint.

It's the best bang for your buck that will quickly refresh a dull, dated room. Slap a fresh, neutral color on the space. Choose a beige or taupe for living spaces and a neutral green or blue for bathrooms.

9. Don't forget the floors.

Get rid of worn carpets, and consider refinishing shabby hardwood floors. An inexpensive new area rug is a quick fix and can disguise the look of old floors.

10. Spring for new light fixtures.

Renew the look of the room by replacing old or dated light fixtures, door hardware, light switches and outlets. If it's tacky and older than you, get it out of there.


Source: HGTV

Read

Spa-Inspired Master Bathroom

When it comes to remodeling your bathroom, the process of narrowing down the options is daunting. You can’t afford to do it all—no matter how much luxury you build into the space, there’s always “just one more thing” you could add. That’s why taking the time to seriously review how you use the space and setting goals for your remodel will keep you on track as you make important decisions about floor plan, fixtures, tile and more.


While you’re brainstorming ideas for your new bathroom, cut out pictures from magazines and learn about various bathroom design layouts to gain inspiration. “When my clients bring pictures and have thought about their dream bathrooms, it gives me direct insight as to what they are looking for and helps me understand what they are envisioning for the project,” says Lori Carroll, president, Lori Carroll & Associates, Tucson, Ariz.


The bathroom sanctuary is more than just a toilet, sink, shower and/or tub. The master bathroom, especially, is where you can get away from it all and unwind at the end of the day. It’s a place to soak away your worries, perhaps by candlelight or with soft music playing in the background. When you step out of the tub, your feet touch a naturally warm surface, and you can easily access bath linens. You step up to a vanity with a sink that pours water without splashing, and cabinets contain your appliances already plugged in (how convenient!). You’re not in a hurry—but if you were, you’d hop into the shower (water temperature pre-programmed) and go.


The master bathroom design is equally about function and setting a relaxing mood. Chances are, this room is shared and space allowances must be made for two. “We are seeing master bathrooms and dressing rooms being designed at the same time,” says Cameron Snyder, president, Roomscapes Luxury Design Center, Boston, Mass., and past-president of the National Kitchen & Bath Association (NKBA). He notes that the dressing room often serves as the entryway to the master bath.


Questions to ask

Here are some questions and considerations to ponder as you dream up your future master bath:

  • How many adults will use the space at one time?
  • What activities aside from usual bathroom fare take place in this room?
  • Do you want to incorporate a dressing room?
  • Do you prefer to take a bath or shower?
  • Would you rather have more counter space or two vanity sinks?
  • Do you have enough space or do you want the bathroom to be larger?
  • What features are currently in the bathroom that you would like to remove?
  • What features would you like to add to your new master bath?
  • Are there enough electrical outlets to suit your needs?
  • Which areas need better lighting?
  • What type of storage do you want/need?
  • What color scheme do you prefer?

Choosing Features

Spacious Showers

Today’s showers can include body sprays, rain shower heads, hand showers, multiple shower heads, therapeutic lights, seats, and infinity drains. A step-in shower without a curb (Roman style shower) is safe for people of all ages. Some are choosing to bundle the shower and tub in a “room,” by placing the freestanding tub in the center of the shower zone, explains Brian Johnson, principal, Collaborative Design Architects, Billings, Mt. The room’s dimensions can be 6 x 8 or 6 x 9 feet. “The tub floats in that shower space and it looks very sculptural,” Johnson says of the completely tiled area within the master bath.


Deep soaker tubs

Tubs are optional in the master bath. But if a good soak is how you like to unwind, you can add bubbly with today’s effervescent tubs and those featuring heated air jets that emit warmth and bubbles. These are replacing water-jet tubs. Also, tubs are less likely to be positioned in a corner where they take up valuable square footage. Tubs are smaller but still made for two. “You might want to consider a separate water heater for the tub if you use it often,” suggests Ken Perrin, president, Artistic Renovations, Cleveland, Ohio.


Separate toilet rooms

Hiding the loo behind closed doors within the master bath gives everyone more privacy, especially when the space will be used by more than one person at a time. Ventilation and lighting are key in this closed off space, and it’s nice to a dedicated vanity with storage if possible.


Vanity privacy

Dual sink vanities gain privacy when a shelving unit is posited between the sinks.


Sink style

Undermounted sinks offer a sleek look and make countertop cleanup a cinch.

Heated floors. Nothing says luxury like stepping on to a warm, tile floor. Radiant heat can be placed below tiles for a reasonable price—Perrin estimates about $600 or less in a small 5x9 bathroom. Johnson notes that radiant heat mats that don’t use a lot of energy are an option for specific areas in the bathroom.

Other considerations 

A natural color scheme will create a timeless, peaceful environment, from fixtures to tile. Recycled glass tiles are “here to stay,” according to Perrin, and placed sporadically throughout the bathroom, they provide interest without making the space busy.


Other features to consider:

  • Cabinets that look like furniture pieces with footed legs and antique detail
  • Steam showers
  • Tile that scales the entire wall, borrowed from European design
  • An upholstered chair or loveseat
  • Magazine rack
  • Television or stereo system built into cabinetry (or behind the mirror in the case of the TV)
  • Heated towel racks—or, as an alternative, a warming drawer that would be installed in a kitchen can efficiently do the job of warming linens in the bathroom
  • Expanded windows and skylights to let in natural light
  • The use of Japanese-style screening in walls separating the toilet and rest of bathroom so the space feels open yet private.


Source: HGTV

Read

Top 6 Kitchen Layouts

Here's a guide to the pros and cons of the most popular kitchen layouts.

Basic Kitchen Layout Types

One-Wall Kitchens

Originally called the "Pullman kitchen," the one-wall kitchen layout is generally found in studio or loft spaces because it’s the ultimate space saver. Cabinets and appliances are fixed on a single wall. Most modern designs also include an island, which evolves the space into a sort of Galley style with a walk-through corridor. 

Galley Kitchen Remodel Ideas

This efficient, “lean” layout is ideal for smaller spaces and one-cook kitchens. The galley kitchen, also called a walk-through kitchen, is characterized by two walls opposite of each other—or two parallel countertops with a walkway in between them. Galleys make the best use of every square inch of space, and there are no troublesome corner cabinets to configure, which can add to a cabinetry budget. 

L-Shaped Kitchen Designs

An L-shaped kitchen solves the problem of maximizing corner space, and it’s a smart design for small and medium sized kitchens. The versatile L-shaped kitchen consists of countertops on two adjoining walls that are perpendicular, forming an L. The “legs” of the L can be as long as you want, though keeping them less than 12 to 15 feet will allow you to efficiently use the space.

With an L-shaped layout, you’ll eliminate traffic: The kitchen will not become a thoroughfare because it’s just not logistically possible. Plus, you can easily add a dining space and multiple work zones to this layout. However, avoid this layout if your kitchen is large and can support other configurations, such as adding an island, or if multiple cooks will be using the space. 

Horseshoe Kitchens

The horseshoe, or U-shape, kitchen layout has three walls of cabinets/appliances. Today, this design has evolved from three walls to an L-shaped kitchen with an island forming the third “wall.” “This design works well because it allows for traffic flow and workflow around the island,” says Mary Jo Peterson, principal, Mary Jo Peterson Inc. “You can get more cooks into the kitchen.” 

Kitchens With Islands

A working kitchen island may include appliances and cabinetry for storage—and it always adds additional work surface to a kitchen. It can provide a place to eat (with stools), to prepare food (with a sink) and to store beverages (with a wine cooler). The island can turn a one-wall kitchen into a galley style, and an L-shaped layout into a horseshoe.

Kitchen islands are incredibly functional, but the No. 1 misperception about islands is that everyone ought to have one. The reality is, many kitchens simply don’t have enough clearance to include this feature. 

Peninsula Kitchens 

A peninsula kitchen is basically a connected island, converting an L-shaped layout into a horseshoe, or turning a horseshoe kitchen into a G-shaped design. Peninsulas function much like islands but offer more clearance in kitchens that do not allow appropriate square footage for a true island. 

Read

Five easy upgrades for your porch and patio

With daylight stretching into early evenings and warm weather headed our way, it’s time to focus on your outdoor space for the season.

Here are five easy ideas for a porch and patio upgrade:

1. Add plants.

Don’t limit your greenery to the garden. One of the fastest ways to freshen up a patio or porch space is to add plants. Consider placing a few planter boxes filled with flowers beneath your windows or add pots with greenery on either side of your front door for a welcoming entrance. If you’re lacking space on the ground, install a few hooks in the ceiling of your porch or beneath your raised deck and hang baskets with trailing plants and vines.


Tip: If you’re a beginner, cultivate your green thumb with a few hard-to-kill plant varieties. Marigolds, violets and pansies are hardy flowers that work well in containers. Check the care label on your plant to make sure it will thrive in your home.


2. Bring inside decor outside.

Indoor-outdoor living gets more popular each year as homeowners look for ways to bring nature into their daily lives. It’s helped more decor options for your outdoor space are better than ever. Bring the indoors out by adding sturdy, rust-resistant furniture to your porch or patio. Then, increase comfort and add a few pops of color with weather-resistant pillows and cushions. Illuminate your entertainment area with string fairy lights so guests can stay well past sunset.

Tip: If you have a smaller space, consider adding a sturdy outdoor mirror to your porch or patio — it can make the area seem much larger than it really is. Avoid a fire hazard by placing the mirror out of direct sunlight. And make sure the reflection won’t confuse the flight patterns of passing birds.


3. Incorporate appliances.

Whether you’re looking to add a second kitchen or need a convenient spot to wash up after a swim, more appliances are available for outdoor use. Everything from outdoor fridges and stovetops to showers are now available. Even electronics such as speakers and televisions are available in weatherproof versions to expand your living space.


4. Get some privacy.

Create a private, enclosed sanctuary on your porch or patio, and add some shade to your space, with decorative lattice or outdoor drapes. If you’d like to try a more natural solution, consider planting some trees around the yard to shield your home from the hot sun — and prying eyes. Even a small trellis with climbing vines can make a big difference in the look and feel of the area. For a more permanent solution, consider adding a screened-in porch to your property.


5. Invest in fun upgrades.

Treat yourself to a few fun things — a fire pit can make your patio area an instant gathering place that you can enjoy even on chilly nights. Or consider hiring a pro to install colourful outdoor tile to make the space pop. You can also look into increasing your outdoor seating options with fun pieces like hammocks or porch swings.


Source: The Star
Read

8 Budget Curb Appeal Projects

Glam the Front Door

Adding pizzazz to your home's front entrance is an easy, low-cost way to up your home's curb appeal. Try painting your door a pretty hue that coordinates with your home's color. "Make sure there is a contrast between the front door and the facade of the home," says Kristine Ginsberg, owner of Elite Staging and Redesign in Morris County, N.J. If your house is gray or white with black shutters, consider painting the front door red, she suggests. Other ways to beautify your home's exterior are adding appealing house numbers to your entrance and hanging a pretty wreath on the door. For extra pop, place a potted plant or two by the front entrance.

Approximate cost: A gallon of paint for the front door will cost as little as $25. Metal house numbers can be purchased for less than $4 each, while a potted mini evergreen like boxwood or a dwarf Alberta Spruce could run you less than $20.

Manicure the Lawn

Tending to your lawn is a do-it-yourself task that can add instant curb appeal to your home. Get out the lawn mower, cut the grass regularly and conquer those weeds. "I think it's always a great idea to edge your lawn for a professional look," Kristine suggests.

If you need to green your lawn in a hurry for an open house or for showings to potential buyers, you can spray your lawn with a green lawn spray paint that's especially formulated for grass, is nontoxic and is environmentally safe. You can do it yourself, or hire a professional lawn painting service.

Approximate cost: No cost to you, unless you bring in a professional to cut or green your lawn. If you artificially green your lawn on your own, you can get a quart of lawn paint, which covers up to 1,000 square feet, for less than $30. Lawn sprayers are available at a variety of price levels, but some are sold for less than $20.

Tend Those Beds

Groomed garden beds tell buyers that a home has been well maintained. Start out by weeding your planting beds and removing any debris. Buy a few bags of mulch and spread enough of it to cover the width and length of your home's front beds. The mulch will give your landscaping a fresh appearance and will keep weeds to a minimum while retaining moisture for your plants.

Try planting some annual flowers like pansies, black-eyed Susans, impatiens and petunias for quick and long-lasting color. The flowers can be bought already in bloom in low-cost flats of 12 to 48 flowers at garden and home improvement stores. "Annuals grow quickly, are inexpensive and bloom longer," Kristine says.

Consider planting brightly colored annuals in the spring and summer and plant flowers with autumn hues (reds, oranges and yellows) in the fall, suggests Joanna Seidler Farber, a Realtor associate with Davis Realtors in East Brunswick, N.J. "Changing it up every so often gives a fresh new feel and look," she adds.

Approximate cost: A 2-cubic-foot bag of mulch can be purchased for $3 or less. Online mulch calculators, like the one available from the National Gardening Association, will help you calculate how much mulch you need to purchase. Meanwhile, a flat of annuals could cost you less than $20, depending on the type of flowers purchased.

Wash Off Dirt

Turn the nozzle on your garden hose to its strongest setting and use the water to blast dirt and debris off sidewalks, your driveway and the front of your home. Be careful not to dislodge or get any water underneath your home's siding. You could rent a power washer at an extra cost, but you probably don't need to go to the trouble — a simple garden hose can do the job, and a power washer can be too powerful and could damage siding.

"If you do use a power washer, don't put it close to windows or doorways," suggests Stephen Boehler, owner of Mr. Handyman of NE Monmouth County in New Jersey. "The pressure can remove caulk and other materials sealing your home."

Cost: Absolutely nothing (minus the cost of water), if you use a garden hose. Renting a power washer will run you about $40 to $75 a day depending on your location and the quality of the equipment. If you'd like to purchase a pressure washer, there are various options available for between $120 and $150 at big home improvement stores.

Tidy Up the Driveway

Buyers won't be impressed by your garbage or recycling containers, so store those on the side of the house (preferably behind a bush, a small fence or a screen) or in the garage. Take care of minor cracks in your driveway by patching or resealing it yourself. Determine how much sealant you'll need by using the length and width of your driveway to calculate its square footage. Then match that up against the product's use recommendations. "Plan on getting 10 percent extra because some areas will absorb more than others," Stephen says. "You can always return unopened pails of sealer."

Stash your car in the driveway or down the block to give your driveway and the approach to your home a neater appearance.

Approximate cost: To DIY seal an average 1,000-square-foot asphalt driveway should cost about $100 to less than $150, depending on the quality of the sealant used.

Make the Windows Sparkle

Clean windows inside and out to make your home sparkle. If your home's windows tilt out, it's quite simple to wash exterior windows. Otherwise, you might need a friend or family member to steady a ladder while you do the work. Try washing outside windows by spraying them with a garden hose to remove dirt and cobwebs. Then sponge them down with a small amount of vinegar or detergent diluted in warm water and rinse. If you need to wash your windows from the outside and your windows don't tilt out, try using a long-handled brush.

Approximate cost: Next to nothing, if you wash the windows yourself. But if your windows are high up and you need to rent a ladder, a 14-foot ladder will cost about $25 to rent for four hours from a big-box home improvement store.

Update Light Fixtures

Removing builder-grade or outdated front door or garage light fixtures will instantly brighten your home's curb appeal. "This is often done by homeowners with a great success rate," Stephen says. "Make sure the breaker inside the electric panel is shut off for where the light is being installed." Before touching any wires, test them with a live-wire testing device, he suggests.

If you don't want to go to the expense of buying new light fixtures, you could try painting or spray-painting your old ones for a fraction of the cost. "If you have outdated light fixtures like 1980s gold, the quickest fix is to paint the light fixture black," says Cindy Lin, general manager/founder of Staged4More Home Staging in South San Francisco.

Approximate cost: A 12-ounce can of spray paint costs less than $8, while attractive wall-mounted exterior lights can be purchased for less than $30 each. A live-wire tester costs less than $20.

Trim Trees and Bushes

Your home needs to be visible from the curb in order to have curb appeal, so cut overgrown bushes and trees, removing branches that block walkways, windows, the driveway and views of the home from the street. "People need to see the front of the house," says Kristine.

Except for very large tree limbs, you most likely can use a pair of hedge or pruning shears for the job. If you don't have your own pair of shears, look into borrowing a set from a friend or neighbor to keep costs down.

Approximate cost: Nothing, if you own a pair of shears, have extra time or have friendly friends or neighbors. If you need to purchase your own shears, expect to pay between $10 and $50.


Source: HGTV

Read

The Ultimate Cleaning Schedule for Your Day, Week, Month, and Year

Raise your hand if you find keeping your home clean totally daunting. Or if you stumble upon dust, rust, or dirt in spots you totally forget about too often for comfort. We get it. Which is why we created this super handy checklist with the Good Housekeeping Institute Cleaning Lab to help you stay on top of how often you should bust out your cleaners and get to work — but there are a few exceptions to keep in mind.


First of all, the obvious: If something looks dirty, don't wait — add it to your immediate to-do list. Secondly, when it comes to sanitation, our guidelines represent the bare minimum so you can ramp up those tasks as needed. And finally, don't forget about laundry, for which we created separate guidelines to follow.

How to Tackle Everything on Your List

Now that you've got the schedule, read up on our time-saving tips and all-time favorite products that will make these jobs as painless as possible.


Tips for Cleaning Every Day

These essential daily tasks cut down on future scrubbing and scouring — not to mention harmful germs and bacteria.

Clean coffee maker or Keurig: Wash removable parts with warm, soapy water or stick dishwasher-safe pieces in the machine. Wipe down the outside and warming plate to remove spills.

Clean dirty dishes: Skip pre-rinsing. Today's machines and detergents make it unnecessary — and a waste of water and time! Enzymes in your dishwasher detergent actually work better when they can attach themselves to food particles.

Sanitize sinks: Use an eraser-type sponge (like Mr. Clean Magic Eraser) to remove marks, then sanitize by plugging the drain, filling the basin with warm water, and swishing a tablespoon of bleach around. Let it sit for five minutes, then rinse.

[gallery id='f1713ef6-52f5-47d7-b72e-83a85e06c6e6' mediaId='' display='list' align='center' size='medium' share='true' expand='' captions='true' suppress-title='false'][/gallery]

Tips for Cleaning Every Week

Tackle one room or job each day so you're not doing everything all at once. For example, devote Monday to cleaning kitchen messes, bring out the vacuum on Tuesday, make Wednesday the day for changing sheets, and so on.

Clean inside of microwave: Heat a microwave-safe bowl filled with 1 cup of water and several tablespoons of vinegar on high power for several minutes until the window is steamy. Let cool for 5 minutes before opening the door, then remove the bowl, and wipe the inside clean with a sponge.

Scrub bathroom surfaces: We like CLR Bath & Kitchen Cleaner for grout and Mr. Clean Magic Eraser Bath for glass, tile, and tub surfaces.

Sanitize sponges: Mix 3/4 cup of bleach in 1 gallon of water and soak the sponge for five minutes, then rinse – that's it.

[gallery id='73885605-947d-4c48-a5c7-e30562074d30' mediaId='' display='list' align='center' size='medium' share='true' expand='' captions='true' suppress-title='false'][/gallery]


Tips for Cleaning Every Month

Again, these don't have happen all on the same day, so split up your tasks and delegate jobs to your partner (and kids!).

Clean a washing machine: Use the special washer cleaner cycle on the newer models, or add a specialty cleaner like Affresh and run a normal cycle with hot water.

Clean dishwasher: Descale your machine by filling a large glass measuring cup with 2 cups of vinegar and placing it on the top rack. Then run the machine without detergent or heat dry.

Clean vacuum: Change your bag when it's three-quarters full to keep suction strong and replace the filter if it's very dirty or torn. Snip threads snarled in the brush with scissors or a seam ripper.

[gallery id='03a6c496-a27e-4802-b195-35fa2fdd6914' mediaId='' display='list' align='center' size='medium' share='true' expand='' captions='true' suppress-title='false'][/gallery]


Tips for Cleaning Every 3-6 Months

It's easy to forget about these tasks, so don't let them sneak up on you!

Wash pillows: Put down and fiberfill pillows in the washer and launder two at a time in warm water on a gentle cycle. Add an extra cold water rinse and spin cycle. Then tumble dry on low heat with a few rubber dryer balls.

Clean inside of oven: Wipe loose bits of food with a damp sponge. Then use the self-cleaning function on your oven to remove burnt-on grime. Wash your racks in the sink with warm, sudsy water and a heavy-duty scrub sponge.

Wash shower curtain liner: Launder plastic or vinyl curtains in the machine on the highest water level with a couple bath towels for extra agitation.


Source: Good Housekeeping

Read

Top 5 Bathroom Styling TIps

Renovating a bathroom is expensive and the old adage that bathrooms and kitchens sell houses is very true.  For these reasons I always recommend keeping a bathroom renovation simple.  Good quality, but classic and timeless, so that you don't tire of it but it will last the distance.


You may feel that this is a bit boring but there is great value in having a clean blank canvass as it is a great backdrop for some individual bathroom styling.  This is where you can introduce some style and make the bathroom contemporary and attractive.  The best part though is that you can update it with minimal cost and disruption.

Let me show you my 5 top tips for individual bathroom styling:

Introducing Colour and Texture

It can be expensive to tile a bathroom from floor to ceiling and I much prefer to only use tiles in the wet areas and have plastered walls that can be painted.  It is a good idea to have a self contained shower, for example at the end of the bathroom or even in a separately designed corner or area.


With freestanding baths that can be positioned away from a wall with a floor tap, you don't need to have as much wall tiling as with a traditional built in bath.

Towel rails, particularly if they are heated, should be on a tiled wall, but there is nothing to say that this should be taken to the ceiling.  This is particularly the case if you are fortunate enough to have high ceilings.  In the image above, I stopped the tiles at the height of the internal doors and then introduced a soft grey to the wall above.

You can always change the colour of paint – perhaps a stronger, darker tone or even a fresh white.  So, by keeping the floor and wall tiles very neutral, you can easily introduce colour in the form of paint to the walls.  This means that the look of your bathroom can be freshened up and changed quite dramatically over the course of just a weekend.


Towels are another way to introduce some colour, even if you have white towels with a trim colour, these will give the room personality and just as important to the success of the room, will introduce some texture.

If your bathroom is large enough then you should consider introducing a rug.  This can be colourful or neutral depending on your style but again, it is the texture that is important here.


A freestanding bath can look lonely without a timber stool.  A handy seat or just a spot to leave the soap tray, whichever use you have for it there is no doubt that the texture and colour in the timber is a nice contrast in a simple white or grey bathroom.


Another benefit to simply painting the walls in your bathroom is that the room looks just that – another room – and you can decorate it with artworks to introduce a homely look.


Layers of Lighting

An entire house benefits from a good lighting plan but this is absolutely essential in a bathroom.  In terms of styling this is one way that you can really make a statement.

A bathroom vanity should have wall lights placed at eye level either side of the mirror.


In addition to LED downlights, a pendant can look stunning and again is such an individual and relatively inexpensive way to make a design statement.  If you are placing a pendant over a bath though you must check that the voltage is low enough and an electrician will be able to advise you here.


Water and electricity do not mix and there are very definite guidelines which you absolutely must follow when installing a pendant in a bathroom.


LED strip lighting underneath a wall hung vanity is a good idea as this can be left on at night and can be just enough to see by in the dark and saves you turning on the lights, waking yourself up completely and then not being able to get back to sleep!

Freestanding Furniture 

My ideal bathroom is one that has space for freestanding furniture.  An antique armoire for towels or a beautiful cabinet for storing bathroom items.  Not only are they practical but this has to be about the best way to introduce some individual style into the bathroom.


Keep the flooring and walls simple and then you can dress the room as you would any other in a house.  If it is large enough, you can add a chair too which makes perfect sense for a space like this.


Accessories

I love to shop for bathroom accessories as there are so many lovely pieces that are available now.  Mother of Pearl trays, gorgeous organic shaped timber bowls, or delicate porcelain dishes.  Whatever your style, there are items that you can add to transform the look of the space.

Remember though that the mantra of ‘keep it simple, decorate and at the end take one item away' should be employed here.


The last thing you want is for your bathroom to be cluttered.  Ensure that the tray, bowl or dish that you employ has a purpose and that your styling vignette doesn't get too busy.

Remember a bathroom attracts condensation and dust from talcum powder and make up so you don't want to set yourself up for too much cleaning!


Rather than installing a built in mirror, consider buying a statement mirror that will help to define the style of the bathroom and also bring in either colour, and/or texture to the space.


Candles are a classic styling accessory and look good styled in groups of three.  Large dishes of different soaps, baskets for guest towels and simple silver trays to contain bathroom items or a vignette are ideas to consider.


Finishing with Greenery

Finally, if you have the space, some statement greenery is the perfect complement to a bathroom.

A mood board is what designers use to put a scheme together.  This way you can see how colours sit next to each other and you can add and take away ideas.  I have a FREE e-book to give you on how to put a mood board together – you can download it here.


Rugs are one of the best styling touches for a bathroom but it can be difficult to visualise how they will work.  You can add images to your mood board but if you really want to see what it looks like, Miss Amara has fabulous rugs that you can buy and return if they are not right – and they pay for the pick-up and return to their warehouse. 


Source: Making Your Home Beautiful 

Read

7 FUN & SIMPLE OUTDOOR ACTIVITIES FOR KIDS

Summer vacation is in full swing, and we’re soaking up as much outdoor play time as possible. Parks, beaches, our backyard, patio and front yard have turned into canvases for my children’s play and imagination. I absolutely love being able to give them a slew of sidewalk chalk or paint, and see them create whatever they’d like.

Just yesterday, while I was nursing the baby, the house got extra quiet. I came out to find an impromptu fort with my kids and their friends, giggling and playing underneath. Summer really is the essence of what childhood memories are made of.


Lately, our front lawn has become a communal gathering spot. It’s become a place to create, play, imagine and actualize. As the kids have been frequenting our front lawn more, I have been taking prompts outside and watching their fun unfold. These simple outdoor activities have been a source of so much enjoyment, laughter, and joy!

Below is a list of our favorite simple outdoor kids activities that we have enjoyed again and again:


1. Water balloon T-Ball/ Baseball.

Depending on your child’s ability level, grab either your t-ball set or just a baseball bat. Pre-fill a bunch of water balloons. Put them in a laundry basket or plastic tub. Head to the park and invite friends to play!


2. Chalk obstacle course.

All you need is chalk and some vision. For literate children, write out an array of gross motor movements in a sequence, like you would hop scotch. For instance: jump like a bunny x 3, hold tree pose on one side, walk on your hands and feet, jump on one foot, hold tree pose on the other side, jump on the opposite foot, twirl x 2, jump up and try touch the sky x 4


3. Hula hoop race & catch.

This is such a simple activity for kids and it’s SO fun. You will need multiple hula hoops. Head to an area with lots of green space, and have the children line up. Holding the hula hoops vertically, roll them with as much force as you can along the ground. Call out each child’s name and have them run after the hoop to catch it. Every time they bring back a hoop, throw another one! This is amazing hand-eye coordination practice.


4. Sensory scavenger hunt.

Collect items you’re sure to find around the park (wood chips, dandelions, leaves, pebbles), affix them to a piece of paper using tape, and have your children look for those items!


5. Toy-made obstacle course.

Grab hula hoops, a toy tunnel, cones, pylons, and anything else you can think of. Encourage your children to organize the obstacle course in a fun and challenging way.


6. Kitchen utensil bubble wands.

Go through a kitchen drawer and collect slotted spoons, fly swatters, spatulas, and anything else that has holes to make bubbles. Make your own bubble solution and then head out to see which utensil creates the best bubbles!


7. “Bake” mud pies and muffins.

All you need are some utensils, pans, and imagination.


Source: Nature's Path

Read

20 Cheap Ways to Update Your Living Room

If you’re the kind of person who likes to switch up your décor on a regular basis, you know how expensive it can be. But the good news is that it doesn’t have to be costly. There are a lot of easy and inexpensive things you can do to change the look of a room without spending a fortune.


Rearrange the Furniture

This is no doubt the least expensive way to update a room because it’s totally free! Moving the furniture around gives your room a whole new look and can satisfy your need for change without any cost. And if you’re not prepared to move all the furniture try rearranging your accessories and bookshelf displays. You’d be surprised at what a big impact it can have.


Paint

Paint is the most obvious way to give a room a new look, and it will only cost you a few dollars and some time. With paint, you have endless options. You can paint the entire room one color; you can paint a feature wall; or you can paint some type of design such as stripes, chevrons, or stencil work. With paint there are no limits.


Change the Lampshades

Lampshades are like little jewels scattered throughout a room. Change them and you change the mood. Try going from white to black, pleated to flat, or plain to patterned. There are a lot more options available than there used to be so finding something you like shouldn’t be difficult. Try stores like Target, Pottery Barn and Lamps Plus to get an idea of what’s out there. And if you can’t find what you like you can always go custom.


Pillows and Throws

Adding pillows and throw blankets is a great way to add color and texture, and the impact they create can give your room a fresh new look - particularly if you change them with the seasons. Taking away heavy, dark pillows and throws that were cozy in the winter and replacing them with light and fresh versions in the summer can lift and freshen a room instantly.


Hang Artwork

There’s a lot that can be done with artwork, from rearranging existing pieces to creating new ones. What’s on the walls has a big impact. If you don’t currently have anything try framing wallpaper or fabric samples, create washi tape art, or frame pages from old books. The idea that artwork has to be expensive is a myth, so try making your own.


Edit the Clutter

When in doubt, edit. Crowding too many things into a room can make it feel small and claustrophobic. To lighten a space simply remove a few items. Everything needs room to breathe so if your space is feeling tight and you want a new look, edit a few items out.


More Cheap Decorating Ideas

  • Replace the window treatments
  • Create a gallery wall with your photos
  • Replace overhead fixtures with thrift store chandeliers (make sure the wiring is up to code)
  • Replace all your picture frames with garage sale versions and paint them all the same color.
  • Find a second-hand mirror and paint the frame to match your space. Hang it across from a window to instantly make your room feel bigger.
  • Spray paint an existing piece of furniture such as a side table or chair.
  • Paint doors and trim. Who says they have to be white?
  • Replace your area rug. Carpet stores often have remnants that can be purchased for very cheap prices.


Source: The Spruce

Read

17 Beautiful and Easy Ways to Transform Your House for Spring

With all the added hours you're spending at home these days because of the pandemic, it's easy to grow tired of the same old surroundings. Well, you've got some extra time on our hands—and it is that time of year—why not use this as an opportunity to change things up a bit? Just remember, spring cleaning doesn't have to be all about boring, tedious decluttering and disinfecting. Sure, those things are essential, especially given what's currently going on in the world, but you don't have to limit yourself to the standard chores on your checklist. Read on for ideas on how you can easily upgrade your home for spring—even while in quarantine.


1 Add some fresh flowers


We could all use a little touch of color right now, so why not brighten things up by adding fresh flowers to your spring update plan this year.

"One of my all-time favorite [ways] to usher in the season is to inundate my home with fresh flowers in beautiful spring colors that pop," says Nicole Gittens, principal designer at New Visions Interiors and Events. "Contain them in simple but interesting clear glass containers and vases so that even the pretty green stems can shine through!"


2 Create entryway vignettes


Brightening you entryway is an easy way to create a welcoming atmosphere for when you return from a stressful venture to the grocery store. "If your entry has a great statement piece you'd like to showcase why not don it with letter boards piped in white, cute spring sayings, fresh flowers, and an assortment of candles in spring scents and hues? Nothing says spring better!" Gittens says. For more home update ideas, check out 27 Amazing Home Upgrades for Every Budget.


3 Construct a gallery wall


If you're tired of sitting in the same space all day you can easily reenergize it by creating a gallery wall. Order a few matching or complementary frames, sketch and measure where you want them to go on your wall, and hang them up using Command Strips so you can change their placement quickly and easily without damaging your walls. If you already have art hanging on your wall simply rearranging its placement could make the space feel like new.


4 Use LED light bulbs


Consider replacing any incandescent light bulbs in your home with energy-efficient LED (light emitting diodes) bulbs while you're changing things for spring. Not only do LEDs cast a brighter light than their incandescent counterparts, but they'll also spring clean your energy bill—an LED can run for 25 times as long as incandescent bulbs and cost much less to run. And for more ways to go green at home, check out 30 Easy Ways to Make Your Home More Eco-Friendly.


5 Try peel-and-stick wallpaper


You don't have to break out the paintbrushes to give your space a whole new vibe in minutes. Peel-and-stick wallpaper makes it easy to completely change the feel and look of a room—and better yet, if that paper feels dated a year down the line, you can remove it without damaging your walls.


6 Repaint your front door


Want an easy upgrade you can do without breaking the bank? Order some paint, put on your overalls, and break and give your front door a fresh look with a more appealing hue. A little tip before you get started: If you're hoping to sell your home in the next few years, it pays to be discerning about your color choice, though: according to Zillow, homes with dark gray or black front doors tend to sell at a higher value.


7 Add some window boxes


While you're stuck inside, you might as well enjoy the view when you look gaze out the windows of your home. Window boxes are an inexpensive addition—you can get them for under $8 at Home Depot—that will instantly brighten the look of your home and provide a place to grow and showcase your favorite plants and flowers for years to come.


8 Update your throw pillows


If your throw pillows have become faded or are starting to resemble something like a pancake because of all the extra use they're currently getting, it may be time to sub them out. "Swap out your darker pillows with heavier textures, such as velvets, for lighter colors and springier materials, such as linens," Gittens says. "It will give your rooms a much crisper feel." If you're looking for an even bigger project, take a shot at making your own pillow covers.


9 Swap out dark curtains for sheer panels


Those heavy, dark curtains may have served their purpose by keeping your house warmer during winter, but now that spring has sprung, it's time to let the sunshine in. Try changing things up with some sheer panels and your home will feel brighter in no time. And with all the time you've been required to spend indoors, getting plenty of vitamin D is more important than ever.


10 Turn your windowsill into a living landscape


This is the perfect time to bring the outdoors inside. Make the most of that springtime sunshine by turning your windowsills into a home for some potted plants. Not only will this add some instant visual appeal to your home, research even suggests that indoor plants can improve people's moods.


11 Hang a front door wreath


Who says that wreaths are only for the holidays? Putting up a springtime wreath can make your home feel more festive without breaking the bank. And if you're feeling crafty and creative, try making your own—it will give your home's exterior a charming personal touch.


12 Refinish your cabinets


You don't need to fully remodel your kitchen to make it feel like a brand new space. Refinishing your cabinets and giving them a new stain or a fresh coat of paint gives you fun project to tackle that will completely change the look and feel of your home.


13 Add new drawer pulls


Want to give your kitchen a five-minute makeover, but you don't know where to start? Try adding new drawer pulls. That's right, swapping out outdated wooden or brass handles and knobs on your cabinets can refresh the room in no time—on a tiny budget, to boot.


14 Swap in a new bath mat


While completely revamping your bathroom may be an ordeal, a new bath mat can make all the difference in how much you enjoy the space. And luckily, this is one of the cheaper upgrades out there—for as little as $10—sometimes even less—you can completely refresh the room.


15 Repaint your baseboards


Between the constant opening and shutting of doors and the heavy foot traffic of your family and pets, the baseboards in your house can start to look a little rough after a while. If you want to upgrade your space, give them that fresh coat of paint they deserve—and take note of how it gives the rest of your home a whole new vibrant feel.


16 And your patio furniture


We have a feeling you may be spending quite a bit of time in your backyard this season. Breathe new life into your outdoor furniture this spring with a quick coat of exterior-grade paint. All it takes is a little cleaning, a little sanding, and two coats of the stuff to turn those beat-up wicker chairs into something fresh and modern.


17 Set out a new welcome mat


With the salt and slush associated with the winter months behind you, it's time to retire that heavy-duty doormat until next year. To brighten up your front step, opt instead for something more seasonal—it's an easy upgrade that will completely change your exterior's aesthetic.


Source: Bestlifeonline

Read

The Ultimate Guide to Indoor Plants

Indoor plants should be an essential component of every interior design. Greenery brightens up indoor spaces and are known to have mood-boosting qualities.


Indoor plants are popular because they are relatively easy to take care of, provide health benefits and can be used in a variety of indoor décor themes. Indoor plants are a great option for those who have little yard space for an outdoor garden or for those who live in climates with severely cold winters.


So, if you’re caring for indoor plants for the first time, our ultimate guide will provide you with the necessary information to allow your green friends to thrive.


To provide you with expert insight, we asked our Senior Horticulturist at Ambius, Matt Kostelnick, to answer the most frequently asked questions about indoor plants.


What are indoor plants?

Indoor plants are plants that grow indoors. There are a variety of tropical plants, like palms, that thrive in indoor environments.


How do you plant indoor plants?

Most of the time, indoor plants are already in containers, so there is no need to plant them. There are typically only two reasons you need to plant an indoor plant.

  1. If your plant is getting too big, then you will need to replant it into a larger container.

  2. If you wanted to grow bulbs indoors, then you will need to plant the bulbs yourself.

How much light do indoor plants need?

Succulents and cacti need continuous, daily sunlight. Plants with foliage need roughly 8 hours of light per day. The amount of light depends on the plants you are growing, so we suggest doing research on the specific plants you are growing.


What qualities make for a good indoor plant?

There are several qualities to look for when selecting an indoor plant.

  1. A good root system – This is incredibly important when choosing a plant. It’s not practical to pull a plant out of its pot to check its roots but if it is a small plant, this can be done. Healthy roots are thick and light in color.
  2. Foliage- Here’s a good rule of thumb when it comes to plant’s foliage: if you can’t see through it, the foliage is thick enough.
  3. Check for disease – Some signs of a plant with pests or disease are: white dots, sticky residue on the leaves and a bad odor.

Which indoor plants require low light?

Indoor plants that need little light could be good fits for locations where light is more dim. Some plants that require low light are:

  • Philodendron – A very common indoor plant that rarely attracts pests. It’s a hearty plant that is adaptable to various environments
  • Pothos or Devil’s Ivy- A plant with colorful and vibrant leaves. This plant does great in a variety of environments, thriving in low light or in bright, indirect light.
  • Dracaena– This is another popular indoor plant with long green leaves. This is one indoor plant you will want to prune if foliage gets too long.
  • Peace Lily- This plant thrives best when the soil is moist, but not overwatered. If you want flowers to appear on your peace lily plant, move your plant to a darker room.

Which indoor plants are the easiest to take care of?

Below is a list of indoor plants that are easy to take care of:

  • Sansevieria
  • Philodendron
  • Most succulents
  • Pothos
  • ZZ plant

Which plants are considered indoor plants?

Plants that require a low amount of light and water to thrive are typically known as indoor plants. Ambius considers these plants as examples of common indoor plants:

  • Dracaena
  • Hedera Helix
  • Sansevieria Zeylanica Superba
  • Scindapsus

What are examples of some common indoor plants?

More examples of common indoor plants include the following:

  • Aglaonema
  • Dracaena
  • Ferns
  • Philodendrons
  • Palms
  • Pothos
  • Spathiphyllum
  • Succulents

What are the best indoor plants?

Good indoor plants will tolerate lower light and humidity. Also, they will be less likely to deal with pests. Plus, they usually do not grow too much (you wouldn’t want an indoor plant to grow at a rapid rate). The best indoor plants include the following:

  • Aglaonema – It is attractive, tolerates low light, and does not grow too quickly.
  • Aspidistra – You should not need to give it a lot of water and it will handle low light. If you’d like to take a vacation and don’t want to be concerned about your plant, aspidistra a great one for you.
  • Succulents – Make sure you give them bright light.
  • Dracaenas
  • Philodendrons

How do you re-pot indoor plants?

Unless your indoor plant has become too large for the pot it is in, you typically don’t need to re-pot indoor plants. For steps and tips on how to properly re-pot plants, check out our blog on re-potting plants.

How do you care for indoor plants?

Here are some tips that will help you care for indoor plants:

  • Keep potting soil moist- It’s important to make sure soil is not too wet nor too dry
  • Make sure the plant pot has drainage holes in the bottom of the pot
  • Place your plant near a light source, whether it’s natural or artificial
  • Determine what species of plant you have so you can more accurately care for it 

How do you prune indoor plants?

If you have no reason to prune plants, don’t do it. But, if you notice your plant getting tally and spindly, then we recommend you prune them.

What are some of the common reasons indoor plants die?

Some of the most common reasons plants die are:

  • Overwatering or underwatering
  • Light Levels (either not enough light or too much light)
  • Neglect 

How long do indoor plants typically live?

On average, indoor house plants last 2-5 years. After that, plants stop thriving and it’s best to invest in another plant.

Which interior plants improve air quality the most?

All plants can act as air purifiers but these plants are more beneficial than others.

      Red-Edged Dracaena
  • Weeping Fig
  • Bamboo Palm

How do indoor plants affect people’s mood?

People are often surprised on how beneficial indoor plants are. Not only do plants clean the air, but they also reduce noise levels and stress in the workplace. For more information on the benefits of indoor plants, click here.

Are indoor plants expensive?

Indoor plants are known for being very affordable. The smaller the plant, the less expensive it will be. We do warn customers from buying plants from large retailers. Oftentimes, large retailers will sell coconut or palm trees, which are large indoor plants sold at a relatively low price.

Just because a plant is large and sold for a low price does not mean you are getting the best deal. We recommend doing some research prior to buying or speaking with a salesperson at a gardening center.


Which indoor plants work well for small living spaces?

The plants below are great for those living in apartments or working in a small workspace. Here is a list of small plants great for small spaces.

  • Philidrens
  • Succulents, if you have a good light source
  • Hedra helix
  • Devil’s Ivy

What is the best kind of indoor plant fertilizer to use?

Go to a garden center and look for a fertilizer with “indoor plant” on the label. You will use less fertilizer for plants inside versus outside, so ensure you use the rate specified for indoor plants. If you’re getting fertilizer for blooming plants, look for a fertilizer labeled with the type of plant (orchids, for example) – but if it is unclear which one you should pick, it’s fine to use fertilizer for houseplants.

How do I get rid of bugs on indoor plants?

Bugs on your indoor plants can be really annoying! If you spot pests, go to a garden center and purchase an insecticidal soap, which usually is contained in a spray bottle. When you notice bugs, spray the entire plant – the undersides and tops of the leaves as well as the stem. Next, wait about two weeks and repeat the spraying. Then, wait two more weeks and spray again.

You will want to spray three times because the soap usually will not eliminate eggs, which could hatch. If your plant is dealing with a severe infestation and you are unable to eradicate the pests, throw out the plant. You can also use a damp paper towel to remove a pest.

How do I know when to water my indoor plant?

Over-watering is a common mistake, and you will want to make sure the plant actually requires water now or if it should wait until later. Here are some ways to see if it’s time to water:

  • Soil probe – This probe will draw out soil, which will help you understand how dry the soil is below the surface.
  • Moisture meter – This tool tells you, on a scale, how dry soil is.
  • Lifting the plant up – Heaviness signifies the plant has enough water, but lightness signifies the plant is dry.
  • Wilting – Wilting typically happens because the plant is not getting sufficient water. Lift the plant to see if it is light in weight or if it’s heavy.
  • Tipping – If the leaf edges begin browning and are crispy to the touch, the plant likely needs water. If the leaf edges are becoming brown but feel mushy, the plant has likely gotten too much water.
  • Yellow leaves – Yellow leaves may also signify that a plant has too much or too little water, but this is not always the case.

How do I care for peace lily plants indoors?

Peace lily plants (spathiphyllum) could make a nice addition to your indoor space, such as an office. These plants need to be watered moderately often, but make sure you do not over-water them. If your peace lily begins wilting, just give it some water. You’ll know it has enough if water begins seeping out of the pot’s drainage holes. Peace lilies also will handle low light. A north-facing window is a nice location for this plant, but you do not necessarily need to put it in a window.


Source: Ambius

Read

10 Steps to Start Your First Garden Off Right

Starting a garden is one of the most rewarding things you can do. Plant fragrant florals or start a vegetable garden (or both!), and everyone can benefit from getting their hands a little dirty. But if you're new to gardening, it can be difficult to know where to start. Still, it doesn't have to be complicated; when you break your project down into manageable steps, you can ease into gardening at your own pace. And soon you'll see the rewards of your efforts with beautiful views, delicious flavors, and colorful blooms. These steps will help you get started from scratch, but if you have something particular in mind, you could also use a garden plan to guide your design.


1. Consider What to Plant

Do you want to plant a vegetable garden? An herb garden? A flower garden? If you choose vegetables and herbs for their contributions to your dinner table, plant ones your family will eat or be willing to try. If you want flowers for their flair, color, and fragrance, decide whether you want annuals that bloom most of the summer but need to be replanted each spring or perennials that have a shorter bloom time but return year after year. Each one, or even a combination, makes a stunning garden but will have different maintenance requirements. One bit of advice: Start small until you know what you’re getting into.


2. Pick the Correct Spot

Almost all vegetables and most flowers need 6-8 hours of full sun each day. So you need to observe your yard throughout the day to figure out which spots receive full sun versus partial or full shade. Don't worry if your lot is mostly shady: You won’t be able to grow tomatoes in shade, but many other plants (such as hostas and outdoor ferns) love it. Don't skip this step, because in order to thrive, your plants need to have their light requirements met. Check plant tags or ask the staff at your local garden center to help you understand out how much sun a plant needs.


Three additional tips: Pick a relatively flat spot for your garden because it’s more difficult, time-consuming, and expensive to deal with a sloping garden. Check for windbreaks (such as your house or your neighbor’s house) that will keep plants from being harmed by strong winds. And put the garden where you can't ignore its pleas for attention: Outside the back door, near the mailbox, or by the window you gaze through while you're cooking. Bonus if that place is close enough to a water spigot that you won't have to drag a hose across the entire yard.


3. Clear the Ground

Get rid of the sod covering the area you plan to plant. If you want quick results (if it’s already spring and you want veggies this summer), cut it out. Slice under the sod with a spade, cut the sod into sections to make it easier to remove, then put it on your compost pile to decompose.

It’s easier to smother the grass with newspaper, but it takes longer. (In other words, you should start in the fall before spring planting.) Cover your future garden with five sheets of newspaper; double that amount if your lawn is Bermuda grass or St. Augustine grass. Spread a 3-inch layer of compost (or combination of potting soil and topsoil) on the newspaper and wait. It'll take about four months for the compost and paper to decompose. But by spring, you’ll have a bed ready to plant with no grass or weeds and plenty of rich soil.

4. Improve the Soil

The more fertile the soil, the better your vegetables will grow. The same holds true for other plants. Residential soil always needs a boost, especially in new construction where the topsoil may have been stripped away. Your soil could be excessively wet, poor and infertile, or too acidic or alkaline. The solution is usually simple: Add organic matter. Add a 2- to 3-inch layer of compost, decayed leaves, dry grass clippings, or old manure to the soil when you dig or till a new bed. If you decide not to dig or are working with an established bed, leave the organic matter on the surface where it will eventually rot into humus (organic material). Earthworms will do most of the work of mixing humus in with the subsoil.

To learn more about your soil, have a soil test done through your county cooperative extension office. They'll lead you through the procedure: How much soil to send from which parts of the garden and the best time to obtain samples. Expect a two-week wait for the findings, which will tell you what your soil lacks and how to amend it.

5. Work the Soil

Working the soil is essential to preparing new beds for sowing or planting because it allows roots to penetrate the soil more easily to access water and nutrients. There are two methods: Tilling and digging.

Tilling consists of cultivating soil with a mechanical device such as a rototiller. This is a good method when you need to incorporate large amounts of amendments. However, it can also disturb microorganisms and earthworms. So it’s better to do too little than too much. Excessive tilling and working soil when it’s too wet or dry damages soil structure and plant roots.


Digging is more practical for preparing small beds. Dig only when the soil is moist enough to form a loose ball in your fist but dry enough to fall apart when you drop it. Use a sharp spade or spading fork to gently turn the top 8 to 12 inches of soil, mixing in the organic matter from Step 4 at the same time. (Walking on prepared beds compacts the soil, so lay down boards temporarily to evenly distribute your weight.)


6. Pick Your Plants

Some people pore over catalogs for months; others head to the garden center and buy what wows them. Either method works as long as you choose plants adapted to your climate, soil, and sunlight. You can even surf the Internet for plants to purchase. Here are a few easy-to-grow plants for beginners:

  • Annuals: Calendula, cosmos, geraniums, impatiens, marigolds,  sunflowers, and zinnias
  • Perennials: Black-eyed Susans, daylilies, lamb's ears, pansies, phlox,  purple coneflowers, and Russian sage
  • Vegetables: Cucumbers, lettuce, peppers, and tomatoes

7. Start Planting

Some plants, such as pansies and kale, tolerate cold, so you can plant them in autumn or late winter. Tomatoes and most annual flowers, on the other hand, prefer warm temperatures, so don't plant them until the danger of frost has passed in your area. Midspring and midautumn are good times to plant perennials.


Many plants, such as lettuce and sunflowers, are easy to grow from seed directly in the garden. Be sure to read the seed packet for information about planting time, depth, and spacing. If you're an adventurous beginner, get a head start on the growing season by sowing seeds indoors a few weeks before the last frost date. There are containers or flats designed especially for seedlings and seed-starting soil mixes available at garden centers. Follow seed packet instructions and place the containers on a sunny windowsill or under grow lights if you don't have window space. Be sure to keep the seeds and seedlings moist but not wet, or they may rot.


An easier method of starting your garden is to buy young plants, called set plants or transplants. Dig holes in your prepared bed based on tag instructions. Remove plants from the container by pushing up from the bottom. If the roots have grown into a big ball (known as being root-bound), use a fork or your fingers to untangle some outer roots before setting it into the hole. Pat soil into place around the roots, then soak the soil with water.


8. Water at the Right Time

Seedlings should never be allowed to dry out, so water daily. Taper off as the plants get larger. Transplants also need frequent watering (every other day or so) until their roots become established. After that, how often you need to water depends on your soil, humidity, and rainfall, though once a week is a good place to start. Clay soil dries out more slowly than sandy soil, so you won't need to water it as often. Sunny, windy conditions dry out soil more quickly than cool, cloudy weather. Still not sure? Feel the soil 3 to 4 inches below the surface. If it feels dry, it’s time to water. Water slowly and deeply, so the water soaks in instead of running off. To minimize evaporation, water in the early morning.

9. Protect Your Garden With Mulch

To help keep weeds out and moisture in, cover the soil with a couple of inches of mulch. You won’t have to water as often, and by preventing sunlight from hitting the soil, you’ll prevent weed seeds from germinating. Choose from a wide variety of mulches, each with its own benefits, including shredded bark, straw, and river rock. If you use an organic mulch, such as bark, compost, or cocoa bean shells (which smell good, by the way), it will nourish the soil as it decomposes. For a vegetable garden or bed of annuals, choose a mulch that decomposes in a few months. For perennials, use a longer-lasting mulch such as bark chips.


10. How to Maintain Your Garden

Your garden is beginning to grow. Help it reach its full potential by keeping up with garden chores. Water the plants. Pull weeds before they get big. Get rid of dead, dying, and diseased vegetation. Banish destructive insects by picking them off the plant and dropping them into a bucket of sudsy water (such as tomato hornworms), hosing them off, or spraying on an insecticidal soap purchased at a garden center. Support tall plants (such as tomatoes) with a trellis, stake, or a tepee. Also, harvest vegetables as soon as they’re ready. And remember to stop and smell the... well, whatever it is you’re growing.


If you enriched the soil with compost before you planted, you may not need to do any additional fertilizing. Then again, some vegetables (including tomatoes and corn) are heavy feeders and may need a quick-release fertilizer every three to four weeks. Ask an expert at the garden center for help and always follow package directions carefully.


Source: Better Homes and Gardens 

Read

8 Easy DIY Projects To Tackle During Quarantine and Make Your Bedroom the Stuff of Dreams

Being stuck at home isn’t easy, especially when you’re sharing the space with your entire family or roommates. So naturally, many of us are probably retreating to the space we may have previously used only for sleep: the bedroom.


Those four walls might feel like they're closing in on you right about now—and you’re probably more than ready for a little pick-me-up. After all, as long as you're stuck in there anyway, you might as well take on a project that will cheer you up, right?

With that in mind, here are eight of our favorite easy projects you can tackle in your bedroom while social distancing.


Source: Realtor.com

Read
The trademarks REALTOR®, REALTORS®, and the REALTOR® logo are controlled by The Canadian Real Estate Association (CREA) and identify real estate professionals who are member’s of CREA. The trademarks MLS®, Multiple Listing Service® and the associated logos are owned by CREA and identify the quality of services provided by real estate professionals who are members of CREA. Used under license.