
Starting a garden is one of the most rewarding things you can do. Plant fragrant florals or start a vegetable garden (or both!), and everyone can benefit from getting their hands a little dirty. But if you're new to gardening, it can be difficult to know where to start. Still, it doesn't have to be complicated; when you break your project down into manageable steps, you can ease into gardening at your own pace. And soon you'll see the rewards of your efforts with beautiful views, delicious flavors, and colorful blooms. These steps will help you get started from scratch, but if you have something particular in mind, you could also use a garden plan to guide your design.
Do you want to plant a vegetable garden? An herb garden? A flower garden? If you choose vegetables and herbs for their contributions to your dinner table, plant ones your family will eat or be willing to try. If you want flowers for their flair, color, and fragrance, decide whether you want annuals that bloom most of the summer but need to be replanted each spring or perennials that have a shorter bloom time but return year after year. Each one, or even a combination, makes a stunning garden but will have different maintenance requirements. One bit of advice: Start small until you know what you’re getting into.
2. Pick the Correct Spot
Almost all vegetables and most flowers need 6-8 hours of full sun each day. So you need to observe your yard throughout the day to figure out which spots receive full sun versus partial or full shade. Don't worry if your lot is mostly shady: You won’t be able to grow tomatoes in shade, but many other plants (such as hostas and outdoor ferns) love it. Don't skip this step, because in order to thrive, your plants need to have their light requirements met. Check plant tags or ask the staff at your local garden center to help you understand out how much sun a plant needs.
Three additional tips: Pick a relatively flat spot for your garden because it’s more difficult, time-consuming, and expensive to deal with a sloping garden. Check for windbreaks (such as your house or your neighbor’s house) that will keep plants from being harmed by strong winds. And put the garden where you can't ignore its pleas for attention: Outside the back door, near the mailbox, or by the window you gaze through while you're cooking. Bonus if that place is close enough to a water spigot that you won't have to drag a hose across the entire yard.
3. Clear the Ground
Get rid of the sod covering the area you plan to plant. If you want quick results (if it’s already spring and you want veggies this summer), cut it out. Slice under the sod with a spade, cut the sod into sections to make it easier to remove, then put it on your compost pile to decompose.
It’s easier to smother the grass with newspaper, but it takes longer. (In other words, you should start in the fall before spring planting.) Cover your future garden with five sheets of newspaper; double that amount if your lawn is Bermuda grass or St. Augustine grass. Spread a 3-inch layer of compost (or combination of potting soil and topsoil) on the newspaper and wait. It'll take about four months for the compost and paper to decompose. But by spring, you’ll have a bed ready to plant with no grass or weeds and plenty of rich soil.
4. Improve the Soil
The more fertile the soil, the better your vegetables will grow. The same holds true for other plants. Residential soil always needs a boost, especially in new construction where the topsoil may have been stripped away. Your soil could be excessively wet, poor and infertile, or too acidic or alkaline. The solution is usually simple: Add organic matter. Add a 2- to 3-inch layer of compost, decayed leaves, dry grass clippings, or old manure to the soil when you dig or till a new bed. If you decide not to dig or are working with an established bed, leave the organic matter on the surface where it will eventually rot into humus (organic material). Earthworms will do most of the work of mixing humus in with the subsoil.
To learn more about your soil, have a soil test done through your county cooperative extension office. They'll lead you through the procedure: How much soil to send from which parts of the garden and the best time to obtain samples. Expect a two-week wait for the findings, which will tell you what your soil lacks and how to amend it.
5. Work the Soil
Working the soil is essential to preparing new beds for sowing or planting because it allows roots to penetrate the soil more easily to access water and nutrients. There are two methods: Tilling and digging.
Tilling consists of cultivating soil with a mechanical device such as a rototiller. This is a good method when you need to incorporate large amounts of amendments. However, it can also disturb microorganisms and earthworms. So it’s better to do too little than too much. Excessive tilling and working soil when it’s too wet or dry damages soil structure and plant roots.
Digging is more practical for preparing small beds. Dig only when the soil is moist enough to form a loose ball in your fist but dry enough to fall apart when you drop it. Use a sharp spade or spading fork to gently turn the top 8 to 12 inches of soil, mixing in the organic matter from Step 4 at the same time. (Walking on prepared beds compacts the soil, so lay down boards temporarily to evenly distribute your weight.)
6. Pick Your Plants
Some people pore over catalogs for months; others head to the garden center and buy what wows them. Either method works as long as you choose plants adapted to your climate, soil, and sunlight. You can even surf the Internet for plants to purchase. Here are a few easy-to-grow plants for beginners:
- Annuals: Calendula, cosmos, geraniums, impatiens, marigolds, sunflowers, and zinnias
- Perennials: Black-eyed Susans, daylilies, lamb's ears, pansies, phlox, purple coneflowers, and Russian sage
- Vegetables: Cucumbers, lettuce, peppers, and tomatoes
7. Start Planting
Some plants, such as pansies and kale, tolerate cold, so you can plant them in autumn or late winter. Tomatoes and most annual flowers, on the other hand, prefer warm temperatures, so don't plant them until the danger of frost has passed in your area. Midspring and midautumn are good times to plant perennials.
Many plants, such as lettuce and sunflowers, are easy to grow from seed directly in the garden. Be sure to read the seed packet for information about planting time, depth, and spacing. If you're an adventurous beginner, get a head start on the growing season by sowing seeds indoors a few weeks before the last frost date. There are containers or flats designed especially for seedlings and seed-starting soil mixes available at garden centers. Follow seed packet instructions and place the containers on a sunny windowsill or under grow lights if you don't have window space. Be sure to keep the seeds and seedlings moist but not wet, or they may rot.
An easier method of starting your garden is to buy young plants, called set plants or transplants. Dig holes in your prepared bed based on tag instructions. Remove plants from the container by pushing up from the bottom. If the roots have grown into a big ball (known as being root-bound), use a fork or your fingers to untangle some outer roots before setting it into the hole. Pat soil into place around the roots, then soak the soil with water.
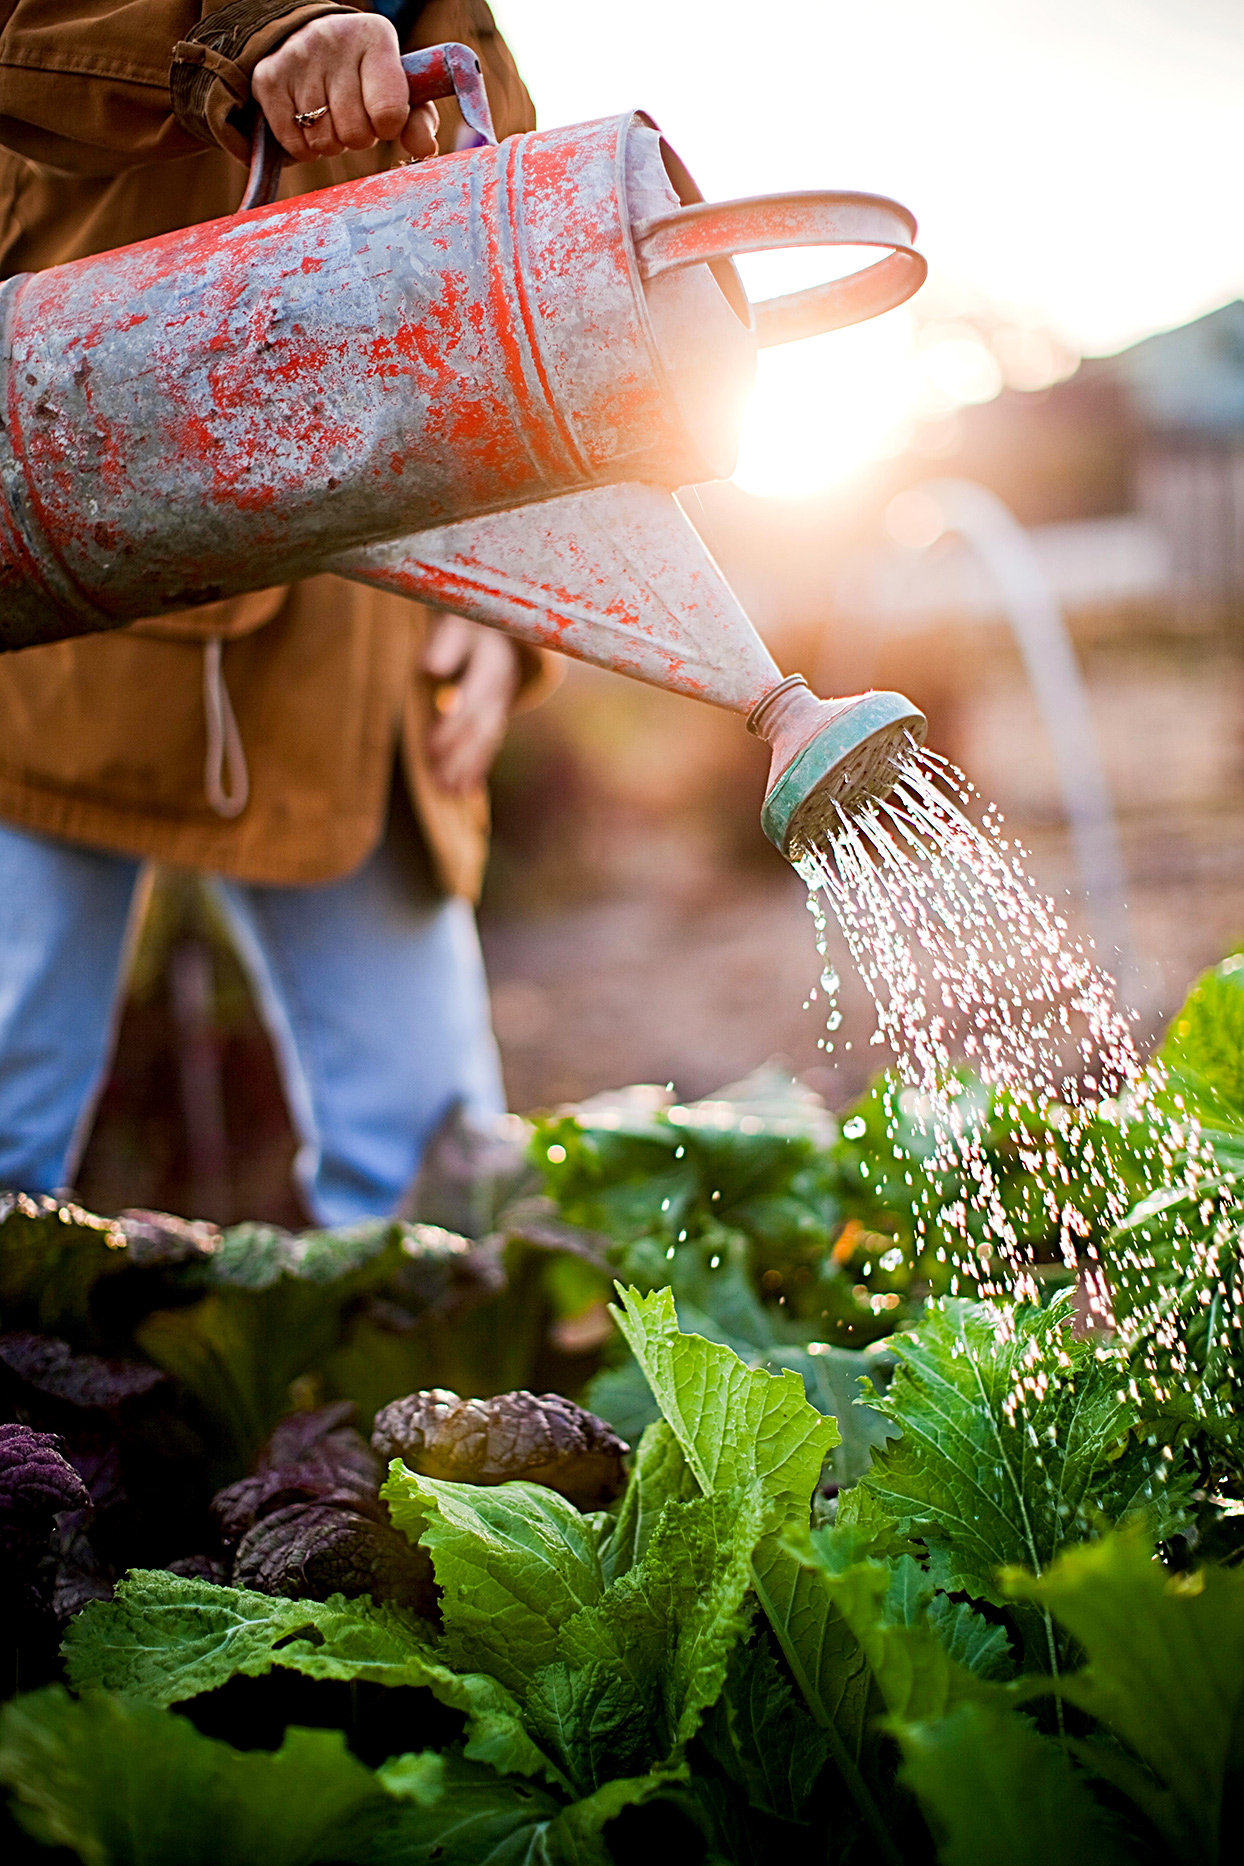
Seedlings should never be allowed to dry out, so water daily. Taper off as the plants get larger. Transplants also need frequent watering (every other day or so) until their roots become established. After that, how often you need to water depends on your soil, humidity, and rainfall, though once a week is a good place to start. Clay soil dries out more slowly than sandy soil, so you won't need to water it as often. Sunny, windy conditions dry out soil more quickly than cool, cloudy weather. Still not sure? Feel the soil 3 to 4 inches below the surface. If it feels dry, it’s time to water. Water slowly and deeply, so the water soaks in instead of running off. To minimize evaporation, water in the early morning.
9. Protect Your Garden With Mulch
To help keep weeds out and moisture in, cover the soil with a couple of inches of mulch. You won’t have to water as often, and by preventing sunlight from hitting the soil, you’ll prevent weed seeds from germinating. Choose from a wide variety of mulches, each with its own benefits, including shredded bark, straw, and river rock. If you use an organic mulch, such as bark, compost, or cocoa bean shells (which smell good, by the way), it will nourish the soil as it decomposes. For a vegetable garden or bed of annuals, choose a mulch that decomposes in a few months. For perennials, use a longer-lasting mulch such as bark chips.
10. How to Maintain Your Garden
Your garden is beginning to grow. Help it reach its full potential by keeping up with garden chores. Water the plants. Pull weeds before they get big. Get rid of dead, dying, and diseased vegetation. Banish destructive insects by picking them off the plant and dropping them into a bucket of sudsy water (such as tomato hornworms), hosing them off, or spraying on an insecticidal soap purchased at a garden center. Support tall plants (such as tomatoes) with a trellis, stake, or a tepee. Also, harvest vegetables as soon as they’re ready. And remember to stop and smell the... well, whatever it is you’re growing.
If you enriched the soil with compost before you planted, you may not need to do any additional fertilizing. Then again, some vegetables (including tomatoes and corn) are heavy feeders and may need a quick-release fertilizer every three to four weeks. Ask an expert at the garden center for help and always follow package directions carefully.
Source: Better Homes and Gardens


Comments:
Post Your Comment: